• Home
  • About me/Chi sono
  • Contact

Un po' di pepe

~ …… (oon∙poh∙dee∙PEH∙peh) Cristina writes about interesting stuff /Cristina scrive di cose interessanti

Un po' di pepe

Category Archives: Recipes

Gnocchi di Zucca

15 Sunday Nov 2015

Posted by Un po' di pepe in Mangiamo!, Recipes

≈ 15 Comments

Tags

Gnocchi, Gnocchi di zucca, Italian food, Pumpkin carving, Pumpkin gnocchi recipe, Traditional recipes

Gnocchidizucca
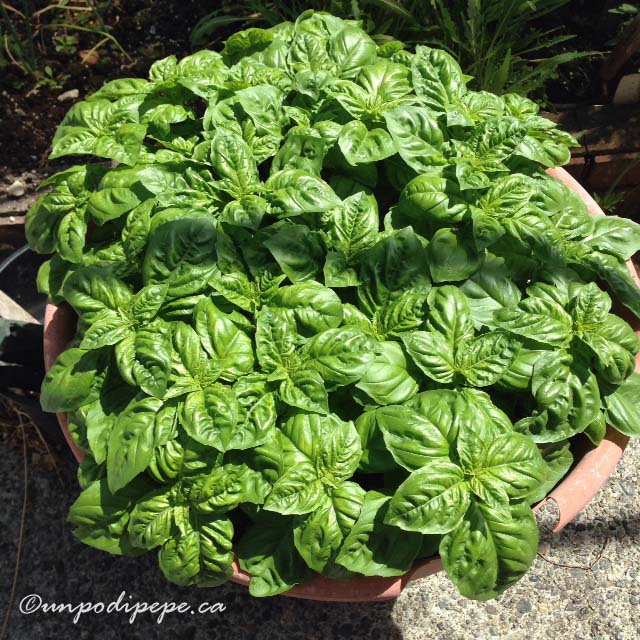
One of my favourite things about fall is zucca (ZOOK•kah).  Zucca can mean pumpkin or squash and I love them both. Risotto di zucca, zuppa di zucca, roasted zucca…..yum! It always makes me sad to throw out my carved hallowe’en pumpkin, so this year, I used a small battery operated candle and ‘recycled’ my zucca into another one of my favourite things- gnocchi! Hallowe'enzuccaGnocchi (NYOK•kee) are usually made with potatoes, but they can also be made with ricotta, zucca, or a combination.  I made mine with no potato- just zucca as they are lighter and have a more intense zucca flavour.  A large hallowe’en zucca makes a lot of gnocchi, but you don’t have to use all of the polpa di zucca (pumpkin flesh) at once.  It can keep in the fridge for 3 days until you have time to make more gnocchi.  All of the measurements in this recipe are very approximate, as it depends on the water content of the zucca.Gnocchidizucca4

Gnocchi di Zucca

500-600 grams mashed roasted zucca (pumpkin) with excess water removed (2 cups)

1 small egg, beaten

160g 00 flour (about 1¼ cup) + extra for dusting

60g (¼cup) grated Pecorino Romano (or Parmigiano if you don’t have Pecorino)

Pinch of freshly grated nutmeg (optional)

Pinch of salt

  • Cut zucca into pieces, wrap in aluminum foil and bake at 180⁰C (350⁰F) for 50 minutes
  • Scoop out the flesh and mash by hand with a potato masher or a fork, or use a potato ricer.   Unless you plan to make zuppa di zucca (pumpkin soup) do NOT use a food processor or immersion blender!
  • Remove as much water as possible, or the gnocchi will absorb too much flour and become dense and rubbery. Do this by straining the mashed zucca through a tea towel. A lot of water will come out! If this is too messy for you, return the mashed zucca to the oven, uncovered for half an hour to remove moisture. The tea towel method works better.
  • Stir in the egg and mix well, then salt, nutmeg and Pecorino.
  • Add half of the flour and mix well
  • Add more flour as needed-only a little at a time. Use as little flour as possible-only enough to make the dough hold together
  • On a floured surface, cut off sections of dough and hand roll into 1.5 cm (½ inch) ropes
  • Cut rope into 2-2.5 cm (1 inch) lengths and roll each gnocco with your thumb against the the back tines of a forchetta (fork) or over a rigagnocchi. Rigagnocchi literally means ‘gnocchi line-maker’. It is a small wooden paddle with lines carved into it, as seen in the photos. I used a forchetta to roll my gnocco over the rigagnocchi.
  • Place finished gnocchi on a floured tray or surface and sprinkle with more flour to prevent sticking. To freeze the gnocchi, place on a floured tea towel on a tray or baking sheet and freeze for half an hour, then put the frozen gnocchi into zip-loc® bags or containers and refreeze.
  • To cook gnocchi, drop them into a large pot of boiling, salted water. They only need about 3 minutes to cook, then lift them out with a slotted spoon. If cooking frozen gnocchi, do not thaw them. Take them directly from the freezer into the boiling water. Frozen gnocchi hold their shape well, but not if they have been defrosted. They will take about 4 minutes to cook.
  • Gnocchi di zucca should be served with a simple sauce, so as not to overpower the delicate taste. I like to heat some extra virgin olive oil and add finely chopped garlic and whole sage leaves, then toss this over my gnocchi. I sprinkled on freshly grated cacioricotta from Orsara di Puglia. If you aren’t lucky enough to have cacioricotta, use freshly grated Pecorino or Parmigiano.Gnocchidizucca6Buon Appetito!

Share this:

  • Share on Facebook (Opens in new window) Facebook
  • Share on Pinterest (Opens in new window) Pinterest
  • Share on X (Opens in new window) X
  • Email a link to a friend (Opens in new window) Email
  • Share on WhatsApp (Opens in new window) WhatsApp
Like Loading...

Pesto Genovese

18 Friday Sep 2015

Posted by Un po' di pepe in Mangiamo!, Recipes

≈ 24 Comments

Tags

Basilico, Italian food, Moretum, Mortar and pestle, Pesto, Pesto Genovese, Pesto recipe, Traditional recipes

Pesto2This year, I grew basilico (basil) from seed again.  Thanks to the unusually warm summer, my plants were happy and grew nicely.  I love to shake the basilico plant a bit, stick my face in it and inhale the incredible aroma.  Some of my basilico was already used to make passata di pomodoro.  The rest will be used to make Pesto, before it starts to rain and the leaves turn brown.basilico

Pesto Genovese, usually just called Pesto, originated in Genoa, Liguria.  It is made with fresh basil leaves, garlic, pine nuts, extra virgin olive oil, Pecorino Sardo or Pecorino Romano, and Parmigiano Reggiano.

Before the age of food-processors, Pesto was made by grinding the ingredients in a marble or stone mortar with a wooden pestle.  The words ‘pesto’ and ‘pestle’ come from ‘pestare‘ which means to pound or crush.  The most flavourful pesto is actually made by hand with a mortar and pestle, but it is hard work! Pesto made with old stone mortar/mortaioLigurian basilico has very small leaves and is easier to grind.  My basilico tends to have very large leaves and is difficult to crush.  The biggest problem with the food processor is that it gets very hot.  I recommend putting the blades in the freezer for an hour before making pesto.  This prevents the food processor from overheating and the pesto is also less likely to turn brown.basilicobw

The ancient Romans made something similar called Moretum.  They named it after the mortar instead of the pestle!  Moretum was a spread made with fresh sheep milk cheese, herbs, salt, pine nuts and olive oil.

Basilico was likely brought to Italia from India, and the climate of Liguria was perfect for it.  The Genovese adapted the Romans’ recipe to include basilico, and Pesto Genovese was born! In Liguria, Pesto is usually served with trofie or linguine.  It is also used on pasta, potatoes and green beans, all cooked in the same pot of water. Yum!

When I make Pesto, I do not measure the ingredients, but I estimated them here for you. Good quality ingredients are necessary to make delicious Pesto.  No skimping!Pesto Genovese

Pesto Genovese

2 firmly packed cups (500 ml) large basil leaves

3 cloves of garlic

¼ cup (50 grams) European pine nuts

salt and pepper

½ cup (125 ml) good quality extra virgin olive oil

½ cup (45 grams) grated Pecorino Sardo or Pecorino Romano

½ cup (45 grams) grated Parmigiano Reggiano

  • Put the blades of the food processor in the freezer for an hour
  • Wash the basil and dry well.  Water on the leaves will turn them brown and the Pesto will go bad.  Yuck!
  • I like to toast the pine nuts as it brings out the flavour, but this is optional
  • Blend garlic and pine nuts in a food processor until fine
  • Add basil, pulsing a handful at a time until blended
  • Add salt and pepper.  Not too much salt, as the cheese is salty too
  • Pour in olive oil slowly while food processor is running
  • Pour it all into a bowl and add the Pecorino and Parmigiano
  • Spoon the Pesto into small jars with tight fitting lids
  • Seal the jar with a thin film of olive oil
  • Pesto keeps well in the fridge for 6-8 months.  If you use part of a jar, add another thin film of olive oil before putting it back in the fridge
  • To freeze the Pesto, leave out the 2 cheeses and add them when you are going to use itPesto1

Buon Appetito!

©2015 unpodipepe.ca

basilico4

Share this:

  • Share on Facebook (Opens in new window) Facebook
  • Share on Pinterest (Opens in new window) Pinterest
  • Share on X (Opens in new window) X
  • Email a link to a friend (Opens in new window) Email
  • Share on WhatsApp (Opens in new window) WhatsApp
Like Loading...

Torta Caprese all’ Arancia

25 Saturday Jul 2015

Posted by Un po' di pepe in Mangiamo!, Recipes

≈ 28 Comments

Tags

Cannolo Award, Capri, Dolci, Gluten-free chocolate cake, Italian food, Southern Italy, Torta Caprese, Traditional recipes

Tortacaprese2In honour of my recent Cannolo Award, I thought this post should be food related.  What is a Cannolo Award?  Read about it here.  Although I love them, I will not be writing about cannoli, but rather about Torta Caprese.

The super cute-issimo cannolo logo

The super cute-issimo cannolo logo

Caprese (cah•PREH•seh) means ‘from Capri’ (CAP•ree) the beautiful island off the coast of Napoli.  I suppose caprese could also mean ‘goatlike’ since capra is goat?  We’ll stick with ‘from Capri’.

There are a few different stories about how Torta Caprese came to be.  The most likely is that it was invented by mistake in the 1920’s or 30’s by a kitchen worker who added ground almonds (mandorle tritate) instead of flour while trying to make something similar to an Austrian Sachertorte for visitors at an Austrian owned pensione on Capri.  It was a big hit, and went on to be served at all of the hotels and tea rooms on the island.

The basic recipe involves mixing melted butter and chocolate in a ‘bagno-maria’ with sugar and egg yolks, then adding whipped egg whites and ground almonds.  Liqueur, usually Strega, is added.  The cake has a hard thin shell and moist interior and the center tends to sink in a bit from the sides.

I recently tasted a yummy orange Torta Caprese, so I decided to try my own version.  After a bit of experimentation, and substituting Gran Marnier for Strega, I ended up with a very nice Torta Caprese all’ Arancia.  It is a 3 bowl recipe, so be prepared to wash lots of dishes!

Torta Caprese all’ Arancia

Ingredients:

  • 250g dark chocolate 70%
  • 175g (¾ cup) butter at room temperature
  • 110g (½ cup) sugar
  • 110g (½ cup) brown or golden sugar
  • grated peel of a large orange
  • 3 tablespoons Gran Marnier, Mandarino, or other orange liqueur
  • 6 eggs, separated
  • 150g (1½ cups) ground blanched almonds (also called almond flour or almond meal)
  • ½ a bustina (packet) Lievito Bertolini or Pane degli Angeli (substitute 2½ teaspoons baking powder if you can’t find these)
  • pinch of salt
  • Icing sugar for dusting

1.  Preheat oven to 180° C (350° F).

2.  Butter the sides of a round springform pan and line the bottom with parchment paper.

3.  Melt butter and chocolate in a double boiler or ‘bagno-maria’ (a stainless steel bowl in a pan of hot water) and let cool.  This can also be done with a glass bowl in the microwave but be careful-only heat in 30 second intervals and stir well.

4.  In another bowl, whisk the egg yolks and brown sugar, then add to the chocolate.  Stir in alcohol and grated orange peel.

PicMonkey Collage

5.  Whip egg whites with an electric mixer until stiff peaks form.  Add the white sugar.

Torta Caprese Collage4

6.  In another bowl, mix almond flour, lievito or baking powder and salt together with a fork.  Fold the chocolate mixture in with a rubber spatula, then fold in egg whites.

Torta Caprese Collage3

7.  Pour batter into pan and bake for 55 minutes to 1 hour, until center is firm.  The center sink in a bit.  Remove the sides of the pan and slide the cake onto a platter.

8.  Dust with icing sugar and serve with orange slices and whipped cream or gelato.  Store at room temperature for up to 3 days…if it lasts that long!

Torta Caprese

Buon Appetito!  Mille grazie to my amiche Anna and Shannon who were very motivated to help me photograph the finished cake.  I wouldn’t let them cut it and have a piece until the photos were done!

torta caprese tagliata

Torta Caprese pezzo

Here is me posing on my first visit to Capri when I was 16. Unfortunately I didn't know about Torta Caprese at the time.

Here is me posing on my first visit to Capri when I was 16. Unfortunately I didn’t know about Torta Caprese at the time.

Downloadable recipe and recipe in italiano will be added as soon as I am home from Italia.  Buon Appetito!

©2015unpodipepe.ca

Share this:

  • Share on Facebook (Opens in new window) Facebook
  • Share on Pinterest (Opens in new window) Pinterest
  • Share on X (Opens in new window) X
  • Email a link to a friend (Opens in new window) Email
  • Share on WhatsApp (Opens in new window) WhatsApp
Like Loading...

Fiori di Zucca

12 Sunday Oct 2014

Posted by Un po' di pepe in Mangiamo!, Recipes

≈ 14 Comments

Tags

Fiori di zucca, Fritelle di zucca, Italian cooking, Pastella, Peppe Zullo, Traditional recipes

Fioridizucca

È davvero finita l’estate! Summer is really over.  I just picked the last fiori di zucca in my garden and I’ll have to wait a long time to taste them again.  Fiori di zucca are a real delicacy and one of my favourite foods.  They are ‘i fiori maschili della zucchina’ the male flowers of the zucchina plant.  The flowers growing off of long, thin stems are male.  The ones growing off the end of a future zucchina are female (femminile).  The female flowers are edible too, but if you pick them there will be no crop of zucchine!  If you pick too many of the male flowers, you will also have no zucchine!

Fiori di zucca maschile e femminile-male flowers grow off of long thin stems and female flowers grow off the end of future zucchine.

Fiori di zucca maschile e femminile-male flowers grow off of long thin stems and female flowers grow off the end of future zucchine.

To clarify, zucca is Italiano for squash or pumpkin. ‘Zucchina’ (given a sex change and called zucchini in North America) means little squash.  The flowers of all 3 can be called fiori di zucca, but it is usually the flowers of zucchine (zucchina is singular and zucchine is plural) that are used in cooking.  Squash and pumpkin flowers can also be used, but they can have a bittery taste.

Fiori di zucca are extremely delicate and will only last a few days after picking. They are even too delicate to freeze.  In Italia it isn’t hard to find fiori di zucca in season.  I recently bought a ‘bouquet’ of them at a market in Foggia for 1 Euro.  Sometimes you can even buy small zucchine with the flowers still attached. I’ve only seen fiori di zucca for sale once in North America, several years ago at a farmer’s market in Seattle.  I won’t even mention how much they cost!  So, if you want to eat fiori di zucca you really need to grow your own-or find a friend who grows them and doesn’t know how good they taste!

Fiori di zucca have a beautiful, delicate taste. I like to cook them a few different ways, but my favourite is in a simple ‘pastella’.  I whisk cold fizzy mineral water (acqua frizzante) with flour or semolino (durum wheat semolina) a drop of olive oil and pepper until it is not too thick or thin-like the consistency of pancake batter.  If it is too thin, it won’t stick, but if it’s too thick, the fiori can be damaged.  Gently clean fiori and remove the sepals-those green leaves at the base near the stem.  Some people remove the stamens inside, but I usually leave them. Dip them in pastella (batter) and fry in hot oil. I usually use grapeseed oil. When they are done, place on a plate with‘carta assorbente’ (paper towel) and add salt.  The bubbles in the mineral water make this pastella light and crispy. The batter doesn’t overpower delicate taste of the fiori like a heavy egg and flour batter would.

Pastellafioridizuccacollage

Fiori can also be stuffed with ricotta before frying (remember the ricotta fatta in casa post) or ‘farciti con mozzarella e prosciutto’-stuffed with mozzarella and prosciutto. Gnam, gnam, gnam (English translation…yum, yum, yum).

Lately I have also been making my fiori di zucca into frittelle (little fritters). This is a good way to stretch out your fiori and use broken and torn ones or include some larger pumpkin flowers.  Measurements are not too important here.  I mix some 00 flour and baking powder, then mix in 1 peeled, grated zucchina until it is coated with flour.  Add some fresh torn basil leaves if you have them and some freshly grated parmigiano or asiago and 1 large or 2 small eggs.  Once this is all mixed, add enough water to give it the consistency of pancake batter.  You will need more water than you think!

Fritellecollage

Gently dip the intact fiori in batter and fry in hot oil. When they are finished, chop up the broken ones and add to the rest of the batter.  Drop about 1 tablespoon of batter at a time into the oil to make ‘frittelle.  Place on paper towel and add salt.  They are delicious hot or cold.  For those of you who absolutely, positively can’t manage without measurements….here is a link to a recipe that is fairly similar.

Fritelle

My friend Peppe Zullo in Orsara di Puglia, il ‘cuoco contadino’ www.peppezullo.it picks hundreds of fiori a day in his orto (vegetable garden) when they are in season.  His ristorante serves ‘fiori di zucca al forno, ripiene con caciocavallo’ (baked and stuffed with caciocavallo). Gnam, gnam, gnam!!!

fioreconcaciocavallo

Looking forward to summer when I can enjoy fiori di zucca again! A l’anno prossimo!


Share this:

  • Share on Facebook (Opens in new window) Facebook
  • Share on Pinterest (Opens in new window) Pinterest
  • Share on X (Opens in new window) X
  • Email a link to a friend (Opens in new window) Email
  • Share on WhatsApp (Opens in new window) WhatsApp
Like Loading...

Ricotta fatta in casa~ Homemade ricotta

02 Monday Jun 2014

Posted by Un po' di pepe in Italian language, Mangiamo!, Recipes

≈ 9 Comments

Tags

cheese making, Food, Homemade ricotta, Italian language, Recipes, Traditional recipes

Ricotta (ree∙COT∙tah) means cooked again. Ricotta is made when the left over liquid from cheese making (whey) is cooked a second time. Vinegar or lemon juice is added to coagulate or curdle the whey and these curds make ricotta. Making ricotta at home from whey isn’t practical, since you need so much of it to make a small amount of ricotta. The do-it-yourself alternative is to use whole milk and the result is every bit as yummy. It will keep in the fridge for up to 5 days, but it won’t last that long!

Freshly made ricotta drizzled with olive oil, ready to spread onto bread

Freshly made ricotta drizzled with olive oil, ready to spread onto bread

You will need:
2 L (8 cups) whole milk (3.25% MF). Organic milk is best. Do not use skim or low-fat milk! I have used lactose-free milk, but it has to be whole milk
1 tsp sea salt
45 ml (3 tablespoons) lemon juice or 60 ml (4 tablespoons) white wine vinegar or clear apple cider vinegar
If using cow’s milk, you can also add up to 250 ml (1 cup) cream depending on how creamy you like it

Directions:
1. In a large pot, stir milk, cream and salt
2. Keep stirring over medium heat until the temperature reaches 80⁰ C (180⁰ F)
3. Add lemon juice or vinegar and stir briefly and gently. Be careful not to stir too much!
4. Keep on low flame for 5 minutes
ricottapentola2014
5. If you start to see bubbles, add a small amount of cold water to keep the milk from reaching boiling temperature
6. Remove from heat and scoop ricotta out with a slotted spoon. Pour through a cheesecloth lined colander or a sieve

ricottacolapasta2
7. Let the liquid drain out, then turn it over onto a plate and ecco-la ricotta!
ricottadicapra

I like to use goat milk, which is naturally creamier. I have had the best results using lemon juice to curdle the milk, but any of the coagulants listed will work well. Do not use the cloudy kind of apple cider vinegar-it gives the ricotta a funny taste. After I made my ricotta, I used the whey to make about 3 tablespoons of ‘real’ ricotta and I added it to the ricotta draining in the colander. I did not notice a taste difference.
Do not throw out the whey! It is rich in vitamins and protein. I used mine to water my olive tree and peperoncini! You can also keep it for adding to soup or risotto, for making bread, or as a substitute for milk in cakes or other recipes.

Links to my other posts featuring ricotta:

Fiori di Zucca

Limoncello Ricotta Cookies

Tortelloni di Ricotta

Buon appetito!

Click here for help with Italian pronunciation.

Vocabolario
Inglese:
                         Italiano:
Whey                              siero
Curds                              caglia
Goat milk                       latte di capra
Cow’s milk                     latte di mucca
Apple cider vinegar        aceto di mele
Whole milk                    latte intero
Lactose-free milk           latte senza lattosio
Skim milk                      latte scremato
Organic                          biologico
Colander                        colapasta
Do-it-yourself (DIY)       fai-da-te
Butterfingers                 Avere le mane di ricotta

Buon appetito, Cristina

Share this:

  • Share on Facebook (Opens in new window) Facebook
  • Share on Pinterest (Opens in new window) Pinterest
  • Share on X (Opens in new window) X
  • Email a link to a friend (Opens in new window) Email
  • Share on WhatsApp (Opens in new window) WhatsApp
Like Loading...
Newer posts →

Enter your email address to follow 'un po' di pepe' and receive notifications of new posts by email.

Join 511 other subscribers
Follow Un po' di pepe on WordPress.com

Popular Posts

  • Troia 1019-2019
    Troia 1019-2019
  • Hairstyling in Ancient Roma
    Hairstyling in Ancient Roma
  • Hostaria Antica Roma~Eat like an Ancient Roman
    Hostaria Antica Roma~Eat like an Ancient Roman
  • Italian Christmas Vocabulary
    Italian Christmas Vocabulary
  • 'The Nuances of Love'
    'The Nuances of Love'
  • Napoli Street Art
    Napoli Street Art
  • Espresso Cookies
    Espresso Cookies

Recent Posts

  • Sanremo 2026
  • Cucina Italiana Patrimonio UNESCO
  • 2025~Un po’ di pepe Year in Review
  • Castel del Monte
  • ‘The Nuances of Love’
  • Hostaria Antica Roma~Eat like an Ancient Roman
  • Santa Maria in Aracoeli
  • Casino dell’Aurora~Villa Boncompagni Ludovisi
  • Nasoni di Roma
  • Bloghiversario #11
  • Fontana di Trevi
  • Acqua Vergine
  • Giubileo 2025
  • Sanremo 2025
  • In Vino there are Memories
  • A Literary Harvest
  • 2024~Un po’ di pepe Year in Review
  • Buon Natale 2024
  • Il Bicerin
  • Mercato Porta Palazzo
  • Torino
  • Catanzaro, Calabria
  • Il Pumo Pugliese
  • Artemisia Gentileschi
  • Cavalli di San Marco

Categories

Amici e Famiglia Architecture Art Art history Art projects Bilingual posts Blogging Canada Culture Feste Firenze Inspiration Italia Italian Folklore Italian language Italian life Italocanadesi Libri Mangiamo! Orsara di Puglia Parole piacevoli Photography Puglia Recipes Roma Travel Travel tips Uncategorized Vino

Archives

Un po’ di pepe on Facebook

Un po’ di pepe on Facebook

Start a Blog at WordPress.com.

  • Subscribe Subscribed
    • Un po' di pepe
    • Join 511 other subscribers
    • Already have a WordPress.com account? Log in now.
    • Un po' di pepe
    • Subscribe Subscribed
    • Sign up
    • Log in
    • Report this content
    • View site in Reader
    • Manage subscriptions
    • Collapse this bar
 

Loading Comments...
 

    %d