Zeppole di San Giuseppe are a traditional pastry served in southern and central Italy on March 19th for la festa di San Giuseppe. In Italia, March 19th is also La Festa del Papà -Father’s Day. In North America, Father’s Day is the 3rd Sunday in June, but in Italia it is always on March 19th because San Giuseppe (St Joseph) was, of course, the papà of Jesus! He is also the patron saint of carpenters, the family, orphans and the homeless. March 19th is also a few days away from spring and the start of the agricultural year, in the fields and vineyards.
Zeppole di San Giuseppe are made with the same choux pastry as bignè di San Giuseppe, but the dough is piped out into ‘nests’ rather than spooned onto the baking sheet. They can be baked or fried. The hole in the center of the zeppola is filled with crema pasticcera, a creamy custard. Finally, the signature detail of zeppole di San Giuseppe….they are topped with un amarena in sciroppo. Amarene are dark, wild sour cherries and they are preserved in syrup. Amarene in sciroppo are likely available at your local Italian market. Note-the word zeppole, singular zeppola, is used in some regions, including Calabria, for a type of doughnut or fried dough.
Zeppole di San Giuseppe are not the easiest thing to make, especially if you are not a baker or used to a piping bag. My first ones did not look beautiful, but they still tasted great. If you need a visual tutorial, there are quite a few good videos online, especially from Benedetta, and Zia Franca.
Zeppole di San Giuseppe
- 150g (175ml, ¾ cup) water
- 125g (½ cup) butter
- pinch of salt
- 150g (285 ml, 1 cup + 2 tablespoons) 00 flour
- 4 medium eggs
Heat the water on low heat and add butter and sugar. Stir until melted and bring to a boil. Add the flour ALL AT ONCE and stir quickly until the mixture leaves the sides of the pan and forms a ball. Remove from heat and let cool slightly, then add the eggs, 1 at a time. A mixer at low speed can be used for this part, but I just used my wooden spoon-less stuff to wash!
Put the dough in a pastry bag with a very large stella, star tip. The tip needs to be at least 1 cm, preferably larger, or the zeppole will come out too small. I was not able to find a bigger tip, so mine were actually zeppoline! Pipe out circular nests with 2 rows of pastry onto carta forno –parchment paper. Bake at 200ºC (400ºF) for 15 minutes, then lower the temperature to 180ºC (350ºF) for 10 minutes. Turn off oven and leave the door partially open to let them cool.
Baked zeppole have a delicate taste. Frying gives them a more robust taste. To fry them, cut the parchement paper into squares. Drop the whole square upside down into hot oil. Remove the paper and turn them. Enrica from Chiarapassion says her Mamma’s secret is to bake them, then fries them so they do not absorb as much oil! Sounds like twice as much work to me though.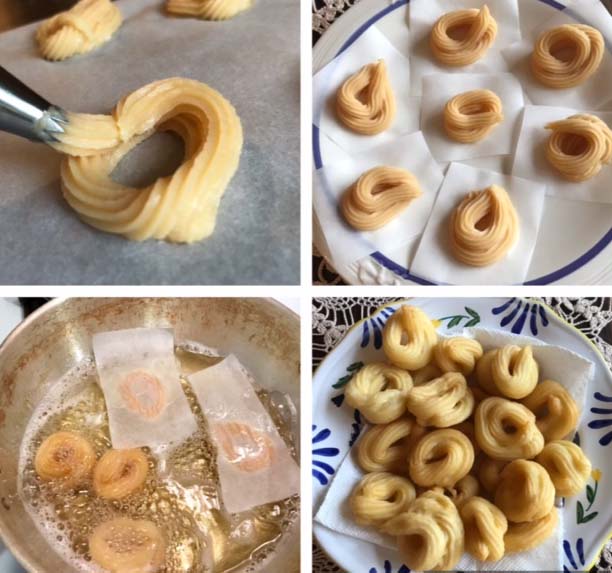
Dust with icing sugar, top with crema pasticcera and amarena with syrup. I served mine with my homemade liquore di foglie di amarena.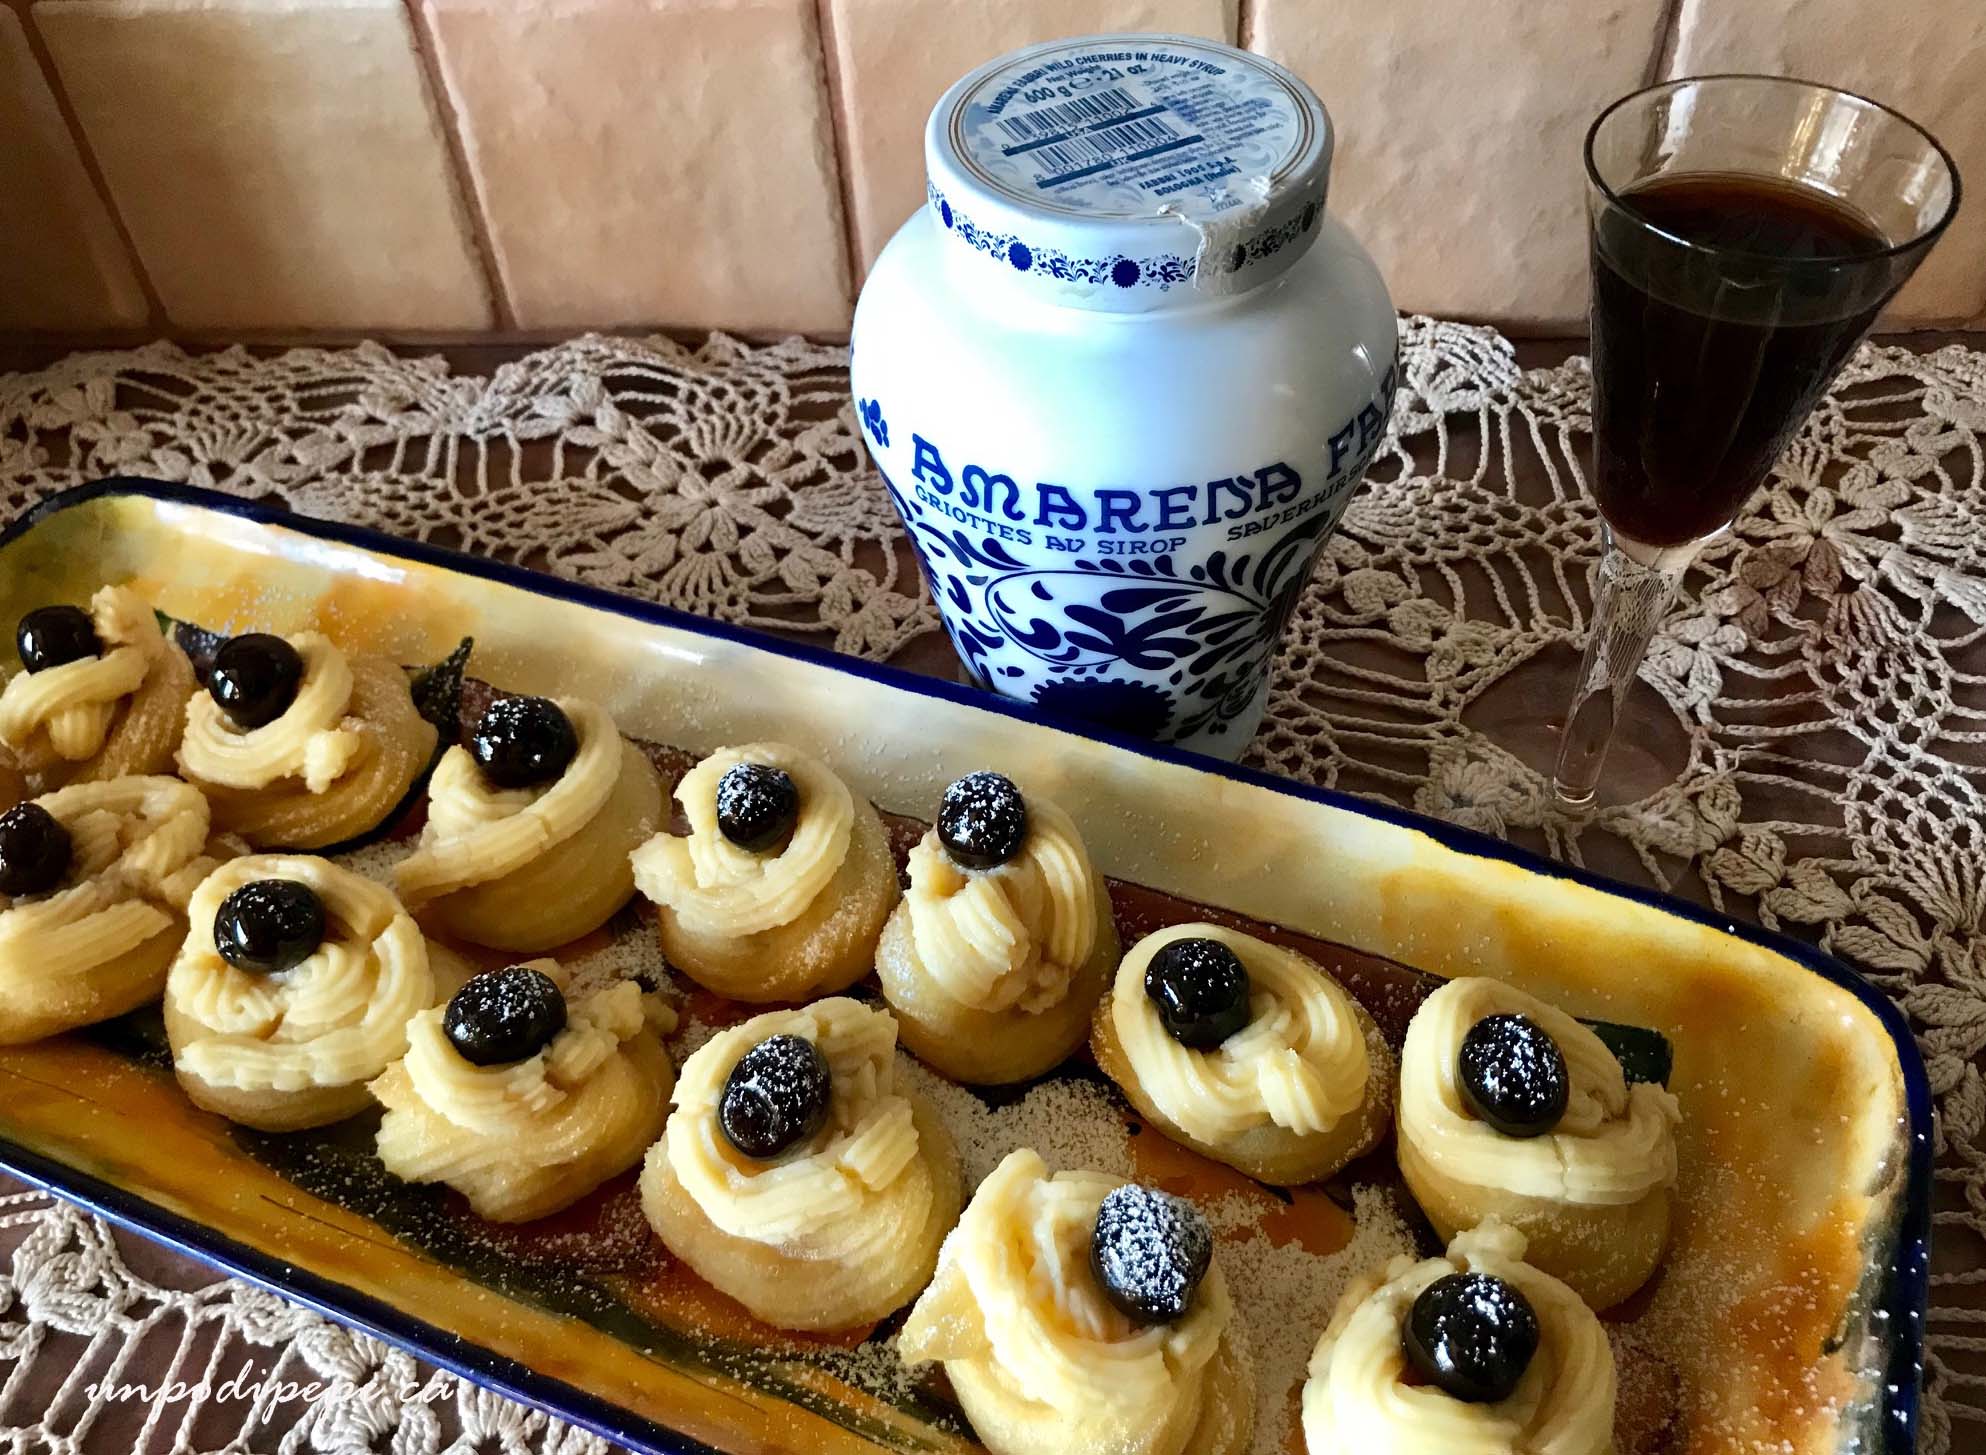
Crema Pasticcera
- 2 whole eggs + 2 yolks
- 80g (6 tbsp, 1/3 cup +1 tbsp) sugar
- 70g (165 ml, ½ cup) flour
- ½ L (500 ml, 2 cups) whole milk
- lemon peel
- vanilla bean(optional)
Heat the milk in a pot with the lemon peel. I use the entire peel. Start at the top and cut it like a corkscrew so you end up with one long peel. In a bowl, beat eggs and yolks, add sugar and whisk. When milk is hot, remove lemon peel and add vanilla bean, if desired. Add other ingredients, whisk and heat until thick. When cool, refrigerate with plastic wrap touching the crema. When ready to use, fill a pasty bag and pipe onto zeppole with a large star tip.
Auguri a tutti i Papà del mondo e Buon Onomastico a tutti i Giuseppe, Giuseppina, Giuseppa, Peppe, Joe, Pina, Josie e Giusy! Ciao, Cristina
PS In my post La Festa del Papà, you can see my absolutely favourite photo of me and papà. Have a look. Cute-issimo, no?