• Home
  • About me/Chi sono
  • Contact

Un po' di pepe

~ …… (oon∙poh∙dee∙PEH∙peh) Cristina writes about interesting stuff /Cristina scrive di cose interessanti

Un po' di pepe

Category Archives: Recipes

Il Bicerin

23 Saturday Nov 2024

Posted by Un po' di pepe in Italia, Mangiamo!, Recipes

≈ 20 Comments

Tags

Northern Italy, Piemonte, Torino, Traditional recipes

November weather is dark and dreary, and has me craving a nice warm Bicerin. Bicerin (bee • SHEH • reen) is the official, historic drink of Torino.  The Bicerin was invented in 1763, at the newly opened Caffè Confetteria Al Bicerin in Piazza della Consolata.

Al Bicerin’s strategic location opposite the Santuario della Consolata, where the King and Royal Family attended Mass on Sundays, made it a popular spot and the beverage became well-known.

The secret recipe is made with local dark chocolate, espresso and frothed fior di latte, and served in a small stemmed glass.  The drink is actually named after the glass, Bicerin being local dialetto for bicchierino, meaning small glass. The glass is clear so that all 3 layers are visible.  A Bicerin is not supposed to be stirred, so that the temperature and texture of each layer can be tasted separately and blend on the palate.

The facade of Al Bicerin is still original and stepping inside is like travelling back in time. The counter, the cabinet filled with glass jars of Confetti and the woodwork is from the 19th Century.

I went to Al Bicerin twice while I was in Torino.  Since the weather was nice, I sat outside both times, but the inside is inviting and cozy.  Perfect for a cold, wet November day. The photo below was taken just before closing.

Count Camillo Cavour, the first Italian Prime Minister always sat in the same corner on his daily visit to Al Bicerin. Now there is a photo of him in his angolo. Other famous patrons include Picasso, Puccini, Nietzsche, Alexandre Dumas, Umberto Eco, and Ernest Hemingway, who apparently called the Bicerin one of the 100 things in the world worth saving!

A fun fact about Caffè Confetteria Al Bicerin is that since 1763, it has always been managed by women!

In 2001, the Bicerin was finally recognized by the region of Piemonte as a traditional Piemontese beverage. Order with a plate of local cookies, which can include canestrelli, torcetti, krumiri, savoiardi and baci di dama.

Bicerin is now served in all of the historic caffè places in Torino but it will be slightly different than the original recipe at Caffè Confetteria Al Bicerin, located at Piazza della Consolata 5 in the Quadrilatero area.

Other historic places to have Bicerin in Torino include:

Baratti e Milano- Piazza Castello 29

Caffè Torino- Piazza San Carlo 29

Caffè Fiorio- Via Po 8/C

Farmacia del Cambio- Piazza Carignano 2

Pepino Piazza Carignano- 8

Pfatish Via Paolo Scacchi- 42

I did some experimenting at home to try and reproduce a Bicerin.  My final product did not taste or look exactly the same, but it was delicious, and the taste-testing ‘research’ was fun.  It takes a bit of juggling to have all 3 layers ready to assemble at once, so do not get discouraged if the first attempt does not look pretty.

Cristina’s attempt at Bicerin

Ingredients:

  • 60 ml (2 oz) light cream*
  • 60 ml (2 oz) chopped 70% dark chocolate, ideally Venchi or other quality brand**
  • 60 ml (2 oz) freshly made espresso doppio/double shot
  • 60 ml (2 oz) frothed whole milk or light cream (must be cold)*

A 300-360 ml (10-12 oz) clear, heat-proof stemmed glass

Instructions:

  • Prepare heat-proof glass by warming with hot water
  • Prepare caffettiera for espresso
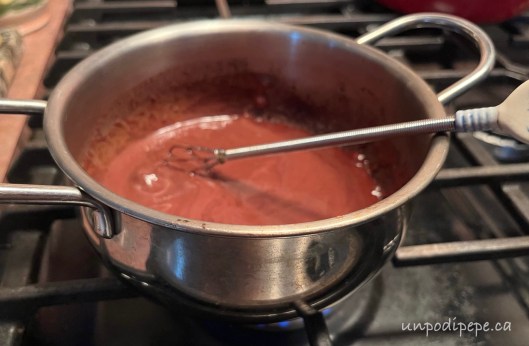
  • Pour light cream* and chopped chocolate into a small pan over low heat and whisk until thick.  Meanwhile, make espresso
  • Shake milk/cream in a small jar for 2-3 minutes

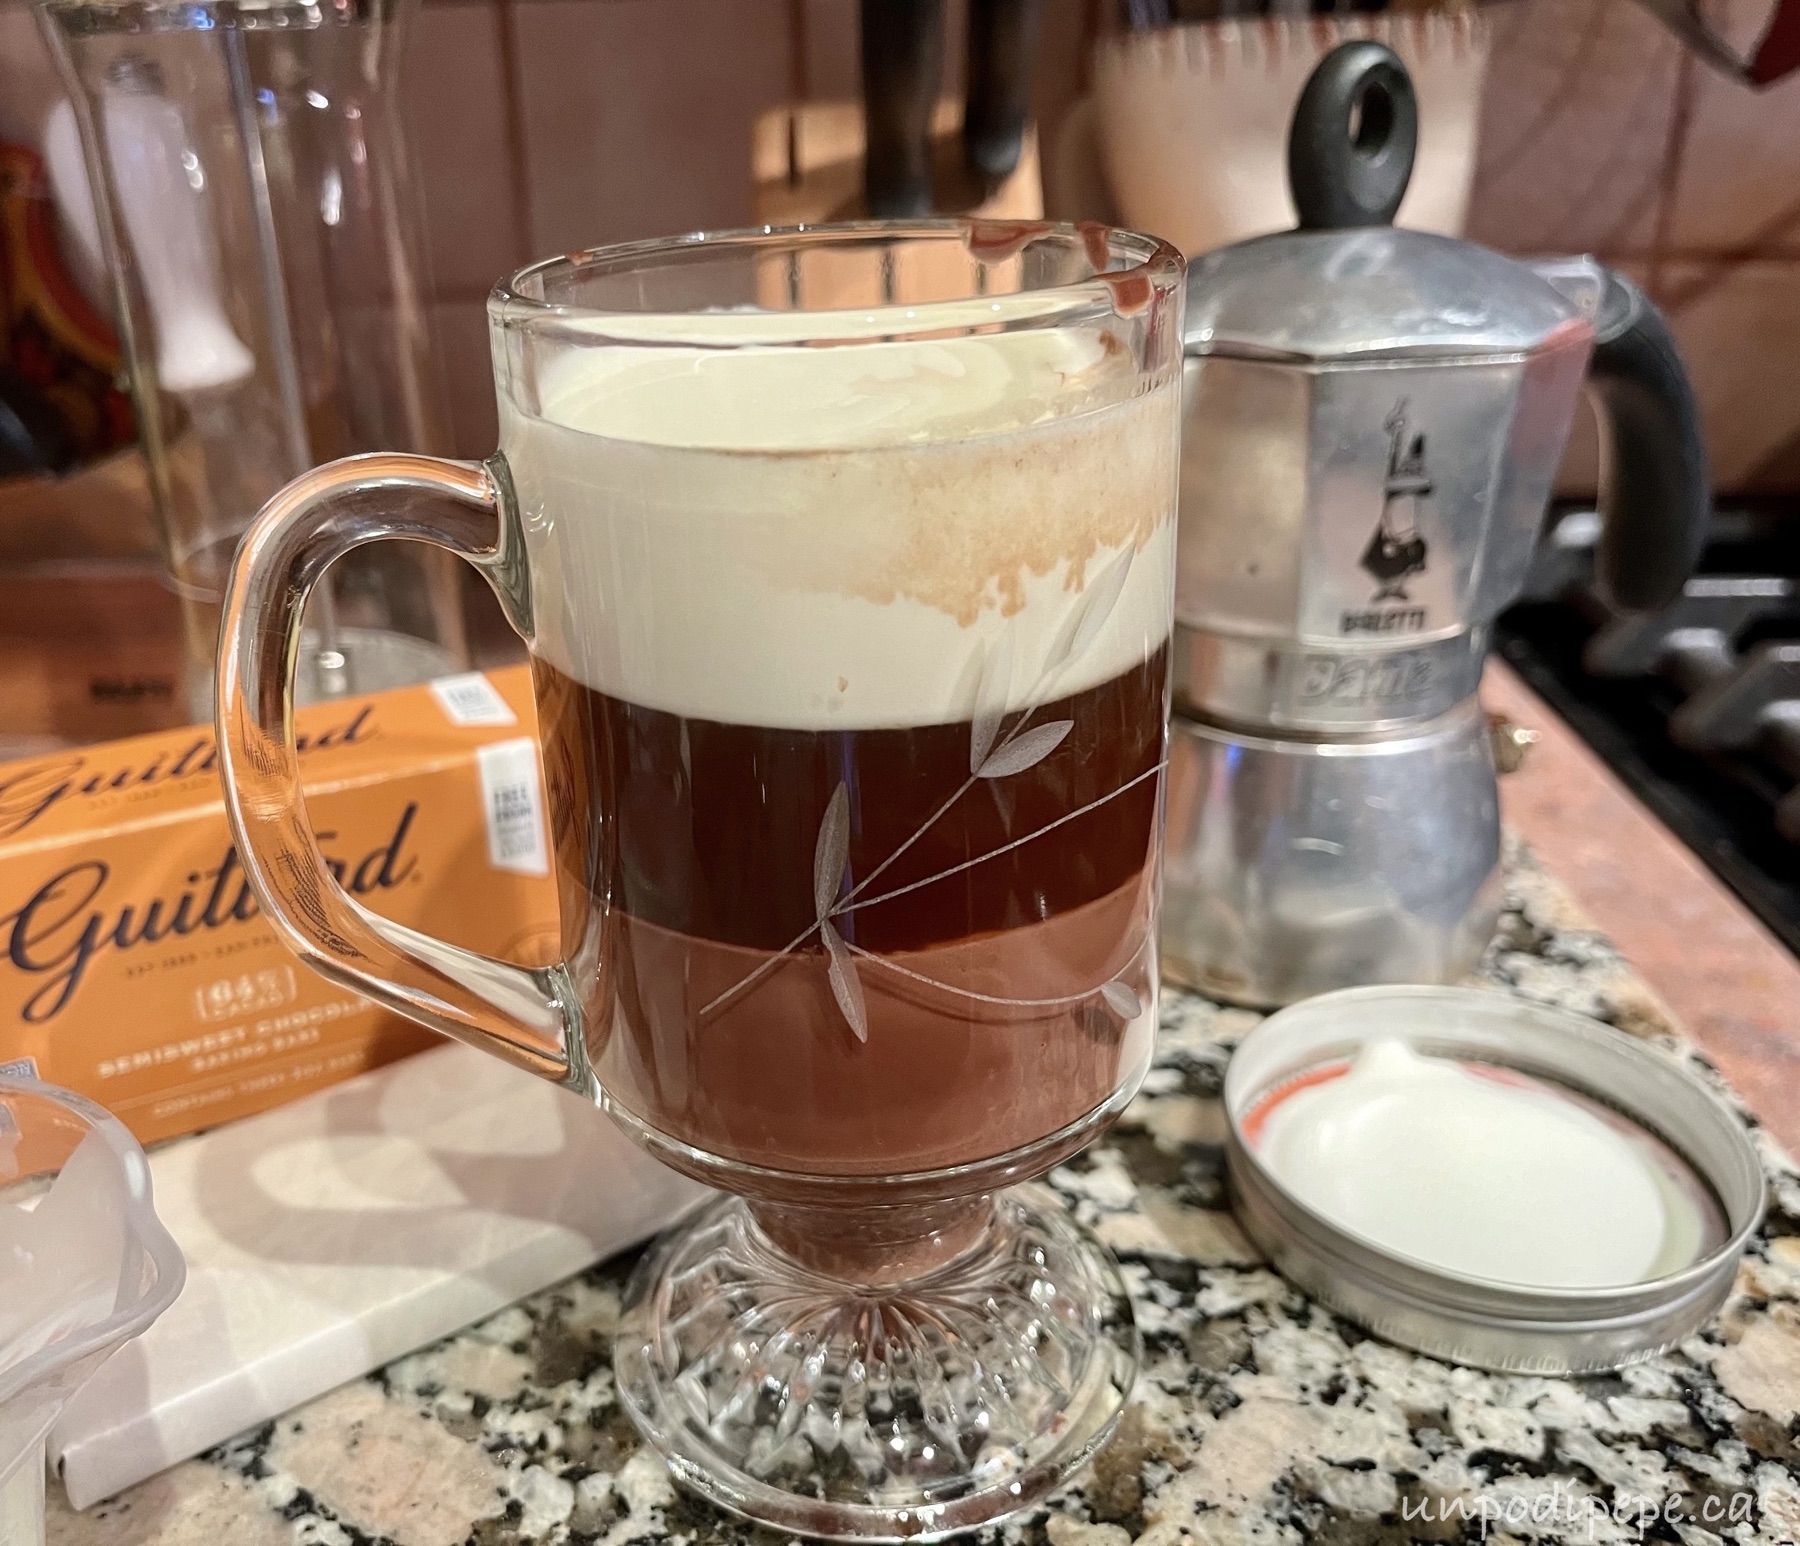
Assemble the Bicerin:

  • Pour hot chocolate into warm glass
  • Using the back of a spoon, carefully pour espresso towards the side of glass
  • Carefully add shaken milk/cream
  • Do not stir!

*Consistency wise, there is no North American equivalent to Italian fior di latte (milk cream) or panna (cream).  I experimented using combinations of whipping cream and milk.  My best results were using a mixture of half whipping cream and half whole milk (3%).  This is what I recommend using for both the hot chocolate and the topping. 1 part whipping cream and 2 parts whole milk also works.

**A Torino produced chocolate such as Venchi is best to use.  I used Guillard as it was the best good quality chocolate I had available.

Espresso cookies go perfectly with Bicerin.  Buon appetito, Cristina

Share this:

  • Click to share on Facebook (Opens in new window) Facebook
  • Click to share on Pinterest (Opens in new window) Pinterest
  • Click to share on X (Opens in new window) X
  • Click to email a link to a friend (Opens in new window) Email
  • Click to share on WhatsApp (Opens in new window) WhatsApp
Like Loading...

Panzerotti

26 Sunday May 2024

Posted by Un po' di pepe in Mangiamo!, Puglia, Recipes

≈ 7 Comments

Tags

brea, Cucina povera, Cucina Pugliese, Italian food, pan, Pizze fritte, Pugliese Traditions, Southern Italy

Panzerotti are a popular Pugliese street food.  In the spirit of ‘cucina povera’ where nothing is wasted, they came about from using leftover bread or pizza dough to make small, fried stuffed pizze. They are crispy outside, fluffy inside and mezzaluna (half moon) shaped.  Panzerotti can have a simple tomato and mozzarella filling, or prosciutto, prosciutto cotto (ham), or fresh sausage cut out of its casing and fried can be added.  Other common fillings include onion, olive, capers anchovies and tomato, and spicy pork, similar to a porchetta.

Panzerotto (singular) is the diminutive form of panza, dialetto for pancia, which means belly, because the dough swells up like a bloated belly when fried in oil!

Panzerotti Recipe:

Dough:

500 g total of flour:  -250g 00 flour (1¾ cups)

                                     -250g semola rimacinata*(2 cups)

10g (2 teaspoons) instant dried yeast

250 ml warm water

Pinch of sugar

60 ml (¼ cup) olive oil, plus more to grease the bowl

125 ml (½ cup) milk

5g (1 tsp) salt

Filling:

250 g passata di pomodoro or a tin of Mutti Polpa, which may need to be strained

Mozzarella -if using fresh mozzarella, drain first to decrease moisture

Prosciutto

Oregano or basil

My favourite ingredient-un po’ di pepe-a bit of pepper!

Sunflower oil for frying

Instructions:  Disolve the yeast in 1 cup water and a pinch of sugar or honey and let sit for 10 minutes.  Add all the flour(s) to a large mixing bowl or on a spianatoia (pasta board).  Make a hole in the center and add the milk, oil and water /yeast.  Mix together with a fork, slowly incorporating more flour.  Add salt last, then knead on a lightly floured surface for 10 minutes, until the dough is smooth and elastic. Add more flour if it is too wet, and more milk if it is too dry.

Lightly oil the bowl and place the dough back in.  Cover with a damp tea towel/cloth so it does not dry out, and let rise 2 hours or until doubled in size.

Roll out 14-15 balls (~ 50g each) and place on a cookie sheet lined with parchment paper.  Cover with a damp tea towel/cloth and let rise for 1 hour. The panzerotti will cook more evenly if they are all about the same size.

Add oregano or basil, and pepper to the tomato passata or polpa.  I do not add salt if using an already salty filling like prosciutto. Drain mozzarella to avoid extra moisture if using fresh.

One at a time, roll a ball of dough into a thin circle.  Add ½ to 1 tablespoon tomato mixture in the center and smooth it around with a spoon.  Do NOT go too close to the edges, and add more in the bottom half of circle.  Add other ingredients to the bottom half of the circle.  Fold in half, pressing edges firmly together, then double seal by folding the edge over again and pinch with fingers to make a fancy design. You do not want the panzerotti to open during frying.  This will make a mess of the oil.  Too much filling and /or too much moisture will also cause them to open.

Keep aside a small piece of dough to test the oil to see if it is hot enough. Fry in sunflower oil in batches of 2-3 panzerotti for 2-3 minutes per side or until golden and puffy.  You can spoon a bit of oil over the top to prevent bubbles-although I like the bubbles!  Drain on paper towels so they stay crispy and do not get soggy.  Fry right away, as if they sit, the dough continues to rise, making them more likely to open.  It is best to make panzerottiwith 2 people-1 to assemble and 1 to fry.  If you do not have 4 hands, put the filled panzerotti in the fridge as you make them, until ready to fry them all.  They are best served soon after frying. Makes about 14-15 panzerotti.  I usually double this recipe and freeze them.

Raw, stuffed panzerotti can also be frozen.  Fry them still frozen, as defrosting may turn them into soup.  Place a splash screen on top of the pan in case the oil spatters!

Panzerotti can also be baked at 200°C (295°F) for 20 minutes, although technically this makes them calzone. Brush the top with egg yolk or oil before baking or they may be dry.

*Semola or semolina is the yellow durum wheat endosperm.  Semola rimacinata has been ground once more.  It gives the dough more of a bite to it.  You can just use 500 g All Purpose flour, but I find the best results using a combination of 00 and semola rimacinata.  It is also common to just use simple pizza or bread dough to make panzerotti, but those are more like stuffed pizze fritte.

**as with all recipes involving flour, it is always best to weigh with a scale rather than measure with cups.

Buon appetito!  Cristina

Share this:

  • Click to share on Facebook (Opens in new window) Facebook
  • Click to share on Pinterest (Opens in new window) Pinterest
  • Click to share on X (Opens in new window) X
  • Click to email a link to a friend (Opens in new window) Email
  • Click to share on WhatsApp (Opens in new window) WhatsApp
Like Loading...

Polpo e patate

20 Tuesday Jun 2023

Posted by Un po' di pepe in Italia, Mangiamo!, Photography, Puglia, Recipes, Travel

≈ 6 Comments

Tags

Cooking octopus, Imerovigli, Mattinata, Octopus and potato salad, Polpo, Santorini, Southern Italy, Traditional recipes

Polpo is one of the joys of visiting the Adriatic in summer.  Polpo or polipo is octopus, from the ancient Greek polypous, meaning ‘many footed.’  In Italiano, polpo and polipo are both correct terms for octopus! It is one of my favourite foods…I love it grilled, or in a summer salad, especially polpo e patate, a cold potato and octopus salad.  Last year, between camping on the beach in Mattinata, a family wedding, a side trip to Santorini, and mamma’s kitchen, there was a lot of polpo in my life.  In this post, I will share some of my polpo photos, instructions for cooking, and how to make polpo e patate.

I had polpo each of the 5 days I was in Santorini.  There it is called Octapodi χταπόδι, meaning ‘eight footed’. The view from the landing outside my hotel room in Thira was the perfect place to sketch.  When I finished sketching, it was too nice to leave.  Instead of going out to dinner, I walked to a restaurant and got takeout octapodi with couscous.  I brought my feast back and ate it at my sketching spot while watching the sunset.  Yiasou!

In Imerovigli, I had this orgasmic fava bean puree with grilled polpo, caramelized onions and capers. I have to try making this some time. Also in Imerovigli, I had a late night dinner of grilled octopodi on potatoes.

Santorini’s small port has a few seafood restaurants, where I had this very Greek grilled octopodi with oregano.

This photo was taken at the outlet mall in Molfetta.  Yes, polpo is mall food in Puglia!

The day after the matrimonio in Puglia we had a long table dinner in an olive grove by the beach in Mattinata.  This is the gorgeous polpo e patate!  #cookinggoals!

When camping on the beach with my cugini, we often grill polpo and then make a salad with it. The mobile fishmonger il pescivendolo  (pesh·ee·ven·DOH·loh) drives around to the different campsites selling fresh seafood. More about this in Campeggio sul Gargano.  We also have polpo on the grill when we go to my nonno’s olive grove for a grigliata.

This photo of mamma washing polpo in our tiny kitchen in Orsara di Puglia was popular on Instagram.  She made a salad, without potatoes but still yummy! The second one was cooked in a tomato sauce the following day.washing octopus

Octopus saladPeople apparently do all sorts of crazy things to tenderize polpo.  It does not need to be beaten against rocks, bashed with a meat tenderizer, or hung on the clothesline!  It just needs to cook in water long enough to tenderize the tough chewy collagen, which is about 1 hour per kg.  Once cooked, it can be eaten, grilled, pan seared in olive oil or saved to use later.  Freezing also helps tenderize, so previously frozen polpo does not need to cook for as long.

Polpo is hard to find in Canada!  I bought a pack of 4 legs/tentacles from Spain, but then had to freeze it as I could not use it right away.  Here is my ‘measurements optional’, flexible recipe for polpo e patate.  It is made with the legs only, as I am not as adventurous as mamma!

Ingredients:      1 kg (2.2 lbs) polpo

                         500 g (1.1 lb) potatoes

                         Good quality extra virgin olive oil

                         10 ml (2 tsp) lemon juice, freshly squeezed

                         10 ml (2 tsp) chopped prezzemolo-Italian parsley

                         2-3 cherry tomatoes

                         1 bay leaf

                         Splash of vinegar

                         100g chopped celery and/or carrots

                         15 ml (1 tsp) capers

                         1 garlic clove, finely chopped (optional)

                         Peperoncino (optional)

                         sale, black pepper

Instructions:

  • Wash and rinse the polpo. I had already done this before freezing it.
  • In a pan, add salt, bay leaf, cherry tomatoes, lemon slices and a splash of vinegar. Cover with water
  • Bring to boil, then lower heat and cook 1 hour. It should be tender enough so that a knife can pierce the polpo with little resistance.
  • Turn off heat and let sit in the cooking water to cool
  • Pick up and immerse 3 times in the hot water if you want the tentacles to curl.
  • When cooled, polpo can either be grilled, pan seared, made into a salad, or stored in the fridge for up to 3 days
  • While cooling, cook potatoes in boiling salted water. Peel and cut into pieces
  • Cut cooled polpo into rounds or pieces. Add to a bowl with potatoes, olive oil, pepper, lemon juice and prezzemolo. You can also add finely chopped garlic and capers, or peperoncino for a little spice.  Add celery, carrots and cherry tomatoes and mix. Add extra prezzemolo and lemon slices for garnish

I didn’t have any celery and was out of capers.  Use whichever of these ingredients you have at the time.  The photos weren’t taken in the best light, but it was delicious! My next one will look like the one I had in Mattinata!

Are you a polpo fan too?  Have you ever cooked it yourself? Let me know in the comments.  Buon appetito, Cristina

Share this:

  • Click to share on Facebook (Opens in new window) Facebook
  • Click to share on Pinterest (Opens in new window) Pinterest
  • Click to share on X (Opens in new window) X
  • Click to email a link to a friend (Opens in new window) Email
  • Click to share on WhatsApp (Opens in new window) WhatsApp
Like Loading...

Tiramisù

20 Saturday Mar 2021

Posted by Un po' di pepe in Mangiamo!, Recipes

≈ 12 Comments

Tags

Cucina Veneta, Dolci, Italian culinary history, Italian desserts, Italian food, Pellegrino Artusi, Tiramisu'

Tiramisu'

Buon Primavera!  It is the first day of spring and March 21st is also Giornata Mondiale del Tiramisù-World Tiramisù Day.  Tiramisù, made up of espresso dipped Savoiardi layered with a cream of whipped eggs and mascarpone, topped with cocoa-is thought to be a rather ‘modern’ creation.  It is widely believed to have been invented in Treviso in the late 1970’s and has been popular worldwide since the 1990’s.  The basis of it has actually existed for a long time, and Tiramisù as we know it today is an evolution of traditional local desserts, aphrodisiacs and energy drinks.  It has quite a controversial history, with at least 6 restaurants in 2 regions claiming to have invented it.  Definitely too many cooks stirring this pot!Tiramisu'

In the ‘dolci al cucchiaio’ (puddings/spoon desserts) section of Pellegrino Artusi’s 1861 book ‘La Scienza in Cucina e l’Arte di Mangiar Bene’ recipe #649 Dolce Torino sounds similar to Tiramisù.  It is made with savoiardidipped in a spicy liqueur layered with a cream made of eggs, butter, icing sugar, milk, vanilla and chocolate, topped with ground hazelnuts and pistachios.

Zabaione, made of raw egg yolks whipped with sugar with marsala or sometimes espresso, was considered a restorative energy drink for newlyweds, new mothers and the sick.  It also often served as a breakfast for children.  In Veneto, it was called sbattutino, meaning little beaten one.

In Treviso, they say the madama at a local brothel served a dish inspired by sbattutino, made with eggs, sugar, caffè and savoiardi to patrons and staff to restore their energy.  Sounds like an early Viagra?  It was called Tireme su, meaning lift me up in dialetto Veneto.  While this is likely leggenda metropolitana– an urban legend, I believe there may be some fact to it!

In his 1968 memoir, Giovanni Comisso (1895-1969), a writer from Treviso wrote about his nonna making a dessert called Tirame-sospiro-su in the early 1900’s and how she remembered it from her childhood.  (Note-I tried but was not able to locate his memoir).

The claim for inventing Tiramisù as we know it today is made in both Veneto and Friuli by at least 6 restaurants!  Owner Alba Campeol and chef Roberto Linguanotto both claim to have invented it around 1969 at the former Ristorante alle Beccherie in Treviso, as well as Carminantonio Iannaccone, a baker who claims he made and delivered the Tiramisú served at the restaurant!  Other Treviso restaurants staking a claim wereAl Camin, El Toula and Le Celeste.  In Friuli Mario Cosolo at Al Vetturino in Pieris and Norma Pielli at Albergo Roma in Tolmezzo both claim to have invented Tiremesù in the 1950’s.  Mannaggia!

Veneto is definitely responsible for popularizing Tiramisù, after the first published recipe appeared in Vin Veneto magazine in 1981. In the US, it became popular after being mentioned by Tom Hanks in the 1993 movie Sleepless in Seattle as being a mysterious dessert that women love.

In 2013, Italian astronaut Luca Parmitano requested it as a special menu item at the International Space Station……dehydrated Tiramisù.  Uh…no, grazie! Tiramisu ingredients

My Tiramisù recipe is classic and simple.  A few notes on the ingredients:

Mascarpone is a product of Lombardia.  Often called a cheese, it is actually a cream, like clotted cream.  It can not be replaced with whipping cream and definitely not with cream cheese!

Eggs are raw in Tiramisù.  If possible, use farm fresh eggs, kept in the fridge until needed.  When separating the eggs, crack the whole eggs into a bowl, then scoop the yolks out by hand and put them in another bowl, rather than using the eggshell to separate them.  Make sure there is no yolk mixed in with the whites.

Caffè = espresso, preferably made in a stovetop Moka pot.  Decaf espresso is fine and will not change the taste.  Do not use North American brewed coffee or instant coffee!

Alcohol is optional.  Marsala is the most traditional alcohol to use.  My family has always treated caffè and Sambuca as a package deal, so this is what I use and I believe it is the yummiest option. 

Savoiardi are usually called Lady Finger Biscuits in English.  They are named after the House of Savoia, the ruling family of Italia.  In the late 1800’s and early 1900’s, savoiardi were considered patriotic.  Read more in the post Margherita di Savoia.  I also like to make Tiramisù with Pavesini. They are smaller, crunchier and much thinner than savoiardi and have a light vanilla taste to them.  This results in an elegant looking Tiramisù with multiple thin layers, as in the photo below.Tiramisu' with Pavesini

Dish-a dish with straight sides rather than flared works best.  I use a 20cm X 30 cm glass baking dish (8 inch X 12 inch) with a plastic lid and it works well for a 2 layer Tiramisú.  If you want a 3rd layer, use a smaller dish.

Tiramisu'

Tiramisù

500g container of Mascarpone

1 400 g package Savoiardi

5 large eggs, separated

60g (¼ cup) sugar plus 10g (2 tsp) sugar

300ml (1½ cups) caffè

Sambuca or preferred alcohol

Cocoa powder or shaved chocolate for topping

Pinch of salt

  • Make caffè and stir in 10g (2 tsp) sugar while still hot, then add alcohol and let cool.
  • Mix yolks with sugar in electric mixer until frothy.  Add mascarpone and mix.
  • In a separate bowl, using clean whisk or beaters, whisk egg whites with a pinch of salt until stiff peaks form.  Note-If you only have 1 mixer bowl and beater, it may be easier to mix the egg whites first.  If any bit of yolk gets into the whites, they will not become fluffy. 
  • Add egg whites to mascarpone mixture, stirring up from the bottom to keep it fluffy.  Do not overmix. Tiramisu' in progress
  • Spread a bit of mascarpone cream mixture to the bottom of the dish
  • Dip savoiardi one by one in caffè/sambuca mixture and arrange on bottom of dish.  Cover with half of the remaining cream mixture and repeat. Tiramisu'
  • Top with sifted cocoa powder or shaved chocolate. 
  • Cover and refrigerate 4 hours or overnight, then cut and serve.  It is best to consume it all by the next day, which is not usually a problem!Tiramisu'

Happy World Tiramisù Day/Buon Giornata del Tiramisù! Do any of you readers, especially those from the Veneto- have Tiramisù origin stories? Buon Appetito, Cristina!

To listen to more about Tiramisú, check out Luca’s podcast on Luca’s Italy.


Share this:

  • Click to share on Facebook (Opens in new window) Facebook
  • Click to share on Pinterest (Opens in new window) Pinterest
  • Click to share on X (Opens in new window) X
  • Click to email a link to a friend (Opens in new window) Email
  • Click to share on WhatsApp (Opens in new window) WhatsApp
Like Loading...

Ravioli Rossi

09 Tuesday Feb 2021

Posted by Un po' di pepe in Feste, Mangiamo!, Recipes

≈ 21 Comments

Tags

Beet pasta dough, Italian food, Pasta fatta a mano, Ravioli, Stuffed pasta, Valentine's Day, Vegetarian pasta

La festa di San Valentino is coming up.  I love the colour red and any excuse to spread love. I also spent many years on a pediatric heart surgery unit-so hearts are a special shape for me!  My nipotine* and I made ravioli rossi a forma di cuore-heart shaped red ravioli so that the whole family can share a fun meal-even though we will not all be together.

Cutting out heart shaped beet ravioli

The pasta is coloured with beets-not food colouring.  This is something I have always wanted to try, even though the thought of staining myself and everything in the kitchen is scary.  We adapted my Ravioli con ricotta e spinaci recipe published in the fall.  I posted a photo of our ravioli on Facebook and Instagram, and had many requests for the instructions.  The adaptations are reviewed here, but you will need to refer to the original post -unless you are already a ravioli making machine.

Start by roasting 4 small or 2 medium beets with a drizzle of olive oil and salt in aluminum foil for at least an hour.   Before they cool, remove skin with a paper towel or gloved hands.  Chop then puree the beets in a food processor or with an immersion blender.  

We made 2 ‘half’ doses of my usual ravioli dough so we could make 2 different shades of red.  

2 eggs

125 ml (½ cup) roasted beet puree

250g (almost 2 cups) 00 flour, plus extra

For the lighter colour, we used about 60 ml (¼ cup) beet puree and added an extra egg yolk-although just using less flour is also an option.  

Mix the beets and eggs, then add in the middle of the flour, if kneading by hand.  I usually knead my dough by hand, but red stained hands did not sound appealing, so I started with the food processor.  When the dough is partially mixed and a uniform colour, transfer to a well-floured surface.  Knead for 10 min, adding extra flour as needed.  The amount of flour will depend on how much moisture is in the beets.  I had to add at least an extra 50g (~1/3 cup).  The dough should spring back when you stick a finger in it, but not stick to the work surface.  It will look and feel like pink play doh!  Cover with an upside down bowl and let sit for at least half an hour.  

We used the same ricotta filling as in the original post, omitting the spinach and adding the zest of half a lemon for extra flavour. This is enough filling for 2 ‘half’ doses of dough.

Heart shaped beet ravioli being shaped

When rolling the dough, flour the work surface as needed.  If the dough is still too moist to go through the pasta machine, sprinkle with flour before rolling it out-but be careful not to use too much.  If the dough is toodry, the 2 pasta sheets will not stick together and the ravioli will open while cooking.  Yuck!

Cutting out heart shaped beet ravioli

Roll the dough to the second thinnest setting on the pasta machine-usually this is a 6.  Use a heart shaped tagliabiscotti – a cookie cutter about 6-7 cm (2¼-2¾ inches) wide.  It is handy to have a slightly smaller size too, for places where there is not quite enough dough to cut the bigger size.  This decreases dough wastage! Press around the filling to remove air before cutting, and seal around the edges with fingers after cutting.  Egg white can be brushed along the edges to seal, but I have never found this necessary.  If the heart shape is not working for you, a traditional shape looks festive too.  

The colour lightens a lot when cooking, so make them as dark as possible!  If you do not like beets, not to worry, they add very little taste to the pasta dough.

Heart shaped beet ravioli boiling

Each half portion of dough will make about 45 ravioli.  Freeze and cook them as described in the original post.  Serve with a simple sauce.  I heat up olive oil with whole or chopped sage leaves and slivered almonds or hazelnuts.  Spoon it on top of the ravioli and sprinkle with Parmigiano Reggiano.  Aglio, olio e peperoncinoalso works well, or a light cream sauce with walnuts. 

Note-If my instructions are not clear or detailed enough you can link to 2 different, but similar heart shaped beet ravioli recipe posts. If you need a video, watch Gabri’s. It is in Italiano, the visuals are helpful even if you do not understand. For a more professionally presented printable recipe, check out Pina’s post.

Buon appetito e auguri per la festa di San Valentino!  Viva l’amore, Cristina

*nipotine means nieces or granddaughters.  In this case it means nieces! Grazie Isabella e Francesca!

Share this:

  • Click to share on Facebook (Opens in new window) Facebook
  • Click to share on Pinterest (Opens in new window) Pinterest
  • Click to share on X (Opens in new window) X
  • Click to email a link to a friend (Opens in new window) Email
  • Click to share on WhatsApp (Opens in new window) WhatsApp
Like Loading...

Panforte di Siena

12 Saturday Dec 2020

Posted by Un po' di pepe in Feste, Mangiamo!, Recipes

≈ 26 Comments

Tags

Cucina Toscana, Dolci, Dolci di Natale, Gastronomic history, Italian Christmas, Natale, Panforte Margherita, Panpepato, Siena, Via Francigena

Panforte di Siena

Panforte is un dolce Natalizie- a seasonal treat from Siena, although it is sold all year round.  A chewy, sweet cake, panforte leaves a wonderful aftertaste of candied citrus, almonds and a bold hit of spices.

Panforte dates back to the introduction of exotic spices from the East, via the port of Pisa.  The earliest known record is from the 13th Century.  Documents in the State Archive of Siena state that a bread rich with pepper, spices and honey was paid as a tax to the monastery of Monte Celso on the seventh of February, 1205.

Panforte di Siena

Panforte was originally made with flour, water, honey and spices, mixed with chunks of fresh autumn fruits such as grapes, figs and plums.  The water content of the fruit kept the bread moist and after a few days, fermentation gave it an acidy flavour. This is where the name panes fortis, or ‘strong bread’ comes from.  It was also known as panpepato because of the abundance of pepper and other spices and the dusting of black pepper on top.

Panforte di Siena ingredients

Panpepato/panforte was made by speziali, spice sellers who could be considered medieval pharmacists.  It was valued not only as a food but also as a medicinal remedy because of the spices it contained.

Siena was on the Via Francigena, the ancient pilgrimage route running through France to Roma, then to Puglia where the ports of Bari, Brindisi and Otranto were transit points for the Holy Land.  This made Panforte known outside of Tuscany. A sweet cake with energy and sustenance, Crusaders carried it on their travels…like medieval energy bars! In 1515, a nun named Suor Berta changed the fruit to canditi-honeyed or candied fruit.  The canditi were usually citrus fruits (orange, lemon and cedro/citron) and dark melon or pumpkin.

Canditi, nuts and especially spices were $$$ costosissimi-making Panforte an extremely expensive item.  Only the wealthy could afford the extravagance.  It was also given to the clergy as a gift on special occasions such as Christmas or local feast days.Panforte confezionato

The recipe remained the same for centuries, almonds, flour, honey, canditi and spices, dusted with black pepper and held together at the bottom with foglie di ostie-a sheet of unconsecrated communion host! That was until 1879, when Regina Margherita di Savoia– of pizza Margherita fame-visited Siena. In her honour, a local speziero made a more delicate ‘white’ version of panforte, without the black candied melon and covered with a dusting of vanilla icing sugar instead of black pepper. It was called Panforte Margherita and is the version most often sold today.  In 2014, Panforte di Siena received the PGI (Protected Geographical Indication) European Union designation of quality label. Panforte di Siena with holly and greenery

In Siena it is thought that Panforte should contain 17 different ingredients.  This is because 17 is the number of Contrade or districts in Siena.  Representatives from the Contrade take part in the Palio di Siena horserace every July 2 and August 16.

A thin wedge of panforte makes a delicious treat with caffè or liqueur after a meal. Panforte makes a beautiful edible gift-but only for very special people! I made mine small, wrapped them in parchment paper then in Florentine paper and sealed the bottom with a large gold sticker.Homemade panforte di Siena

I use white pepper, as the flavour is more delicate, while still providing heat.  It is hard to find good canditi, so I made my own with organic orange and lemon peels using Domenica’s recipe. canditi

My homemade canditi ran out after 2 batches, then I substituted chopped dried Kalamata and Mission figs and sour cherries. The zest of an orange added a bit of citrus flavour. For the ostie, I used something called ‘edible wafer paper’ made with potato starch. Edible rice paper is also available at specialty food stores.

Panforte di Siena

Ingredients:

125g (1 cup) hazelnuts

200g (1½ cups) blanched almonds

175g (1½ cups) icing sugar, sifted

200g (⅔ cup) good quality honey

30ml (2 tbsp) water

300g candied fruit peel (orange, lemon, citron) and/or dried fruit

Grated orange or lemon zest

5g (1 tsp) ground cinnamon

2g (¼ tsp) ground ginger

2g (¼ tsp) ground cloves

2g (¼ tsp) ground star anise

3g (½ tsp) ground coriander

2g (¼ tsp) ground nutmeg

2g (¼ tsp) ground white pepper

175g (1½ cup) flour, sifted

Ostie-unconsecrated communion wafer /wafer paper/rice paper

Icing sugar to coat

 Instructions:

  1. Using a heavy saucepan and a low flame, set the icing sugar, honey and water to boil. Stir frequently with a wooden spoon, being careful to keep the syrup from sticking. This will take a while, so in the meantime, do steps 2 and 3.
  2. Use tart pan(s) with removable bottoms.  Line with the ostie/wafer paper. If needed, grease and dust the sides with cocoa powder.
  3. Toast the nuts lightly for 6-10 min in a 200°C (400ºF) oven.Panforte dry ingredients
  4. Coarsely chop the nuts with a knife, or leave whole.  Dice the candied fruit and mix with the spices and nuts, then add in the sifted flour.
  5. When the syrup in step 1 reaches at least 100°C (200°F ), remove pot from heat and stir into the nut mixture. If you do not have a candy thermometer, use a toothpick to pick up a bit of syrup and pass it under cold water. If it becomes solid, it is ready.Panforte syrup in a pot
  6. Working quickly, using wet hands and 2 tablespoons, divide the batter into the tart pan(s), smoothing the top with damp fingers or the back of a wet spoon. It can also be pressed down with the bottom of a glass.Panforte crudo
  7. Bake in a 150° C (300°F) oven for 35-40 minutes. Do not let the panforte brown, or it will be too hard. Panforte cooking in the oven
  8. Remove the panforte from the pans and let it cool completely on a rack. Dust with icing sugar on all sides. and serve cut into thin wedges.
  9. Panforte keeps well for a month if wrapped in parchment paper or in an airtight container and stored in a cool, dark place. Do not store in the fridge.
  10. This recipe makes one 22cm (9½ inch) panforte in a springform pan or six-seven 10cm (4 inch) panforte in tart pans. A 25cm (10 inch) round of parchment paper and fancy paper wraps the 10cm size.Panforte di Siena wedge with espresso and Christmas ornaments
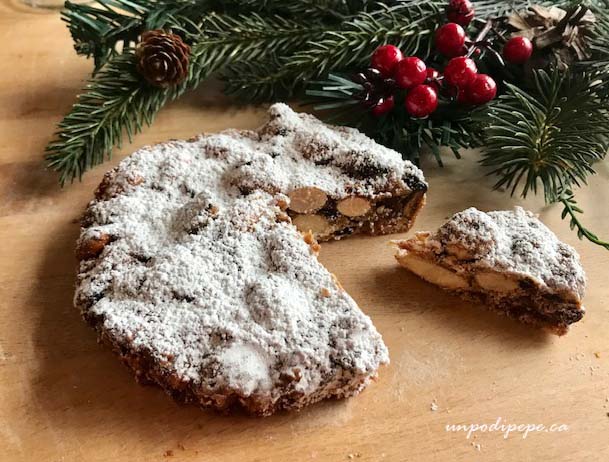
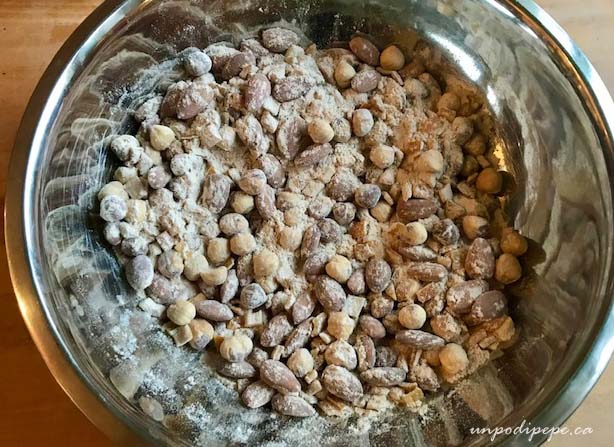
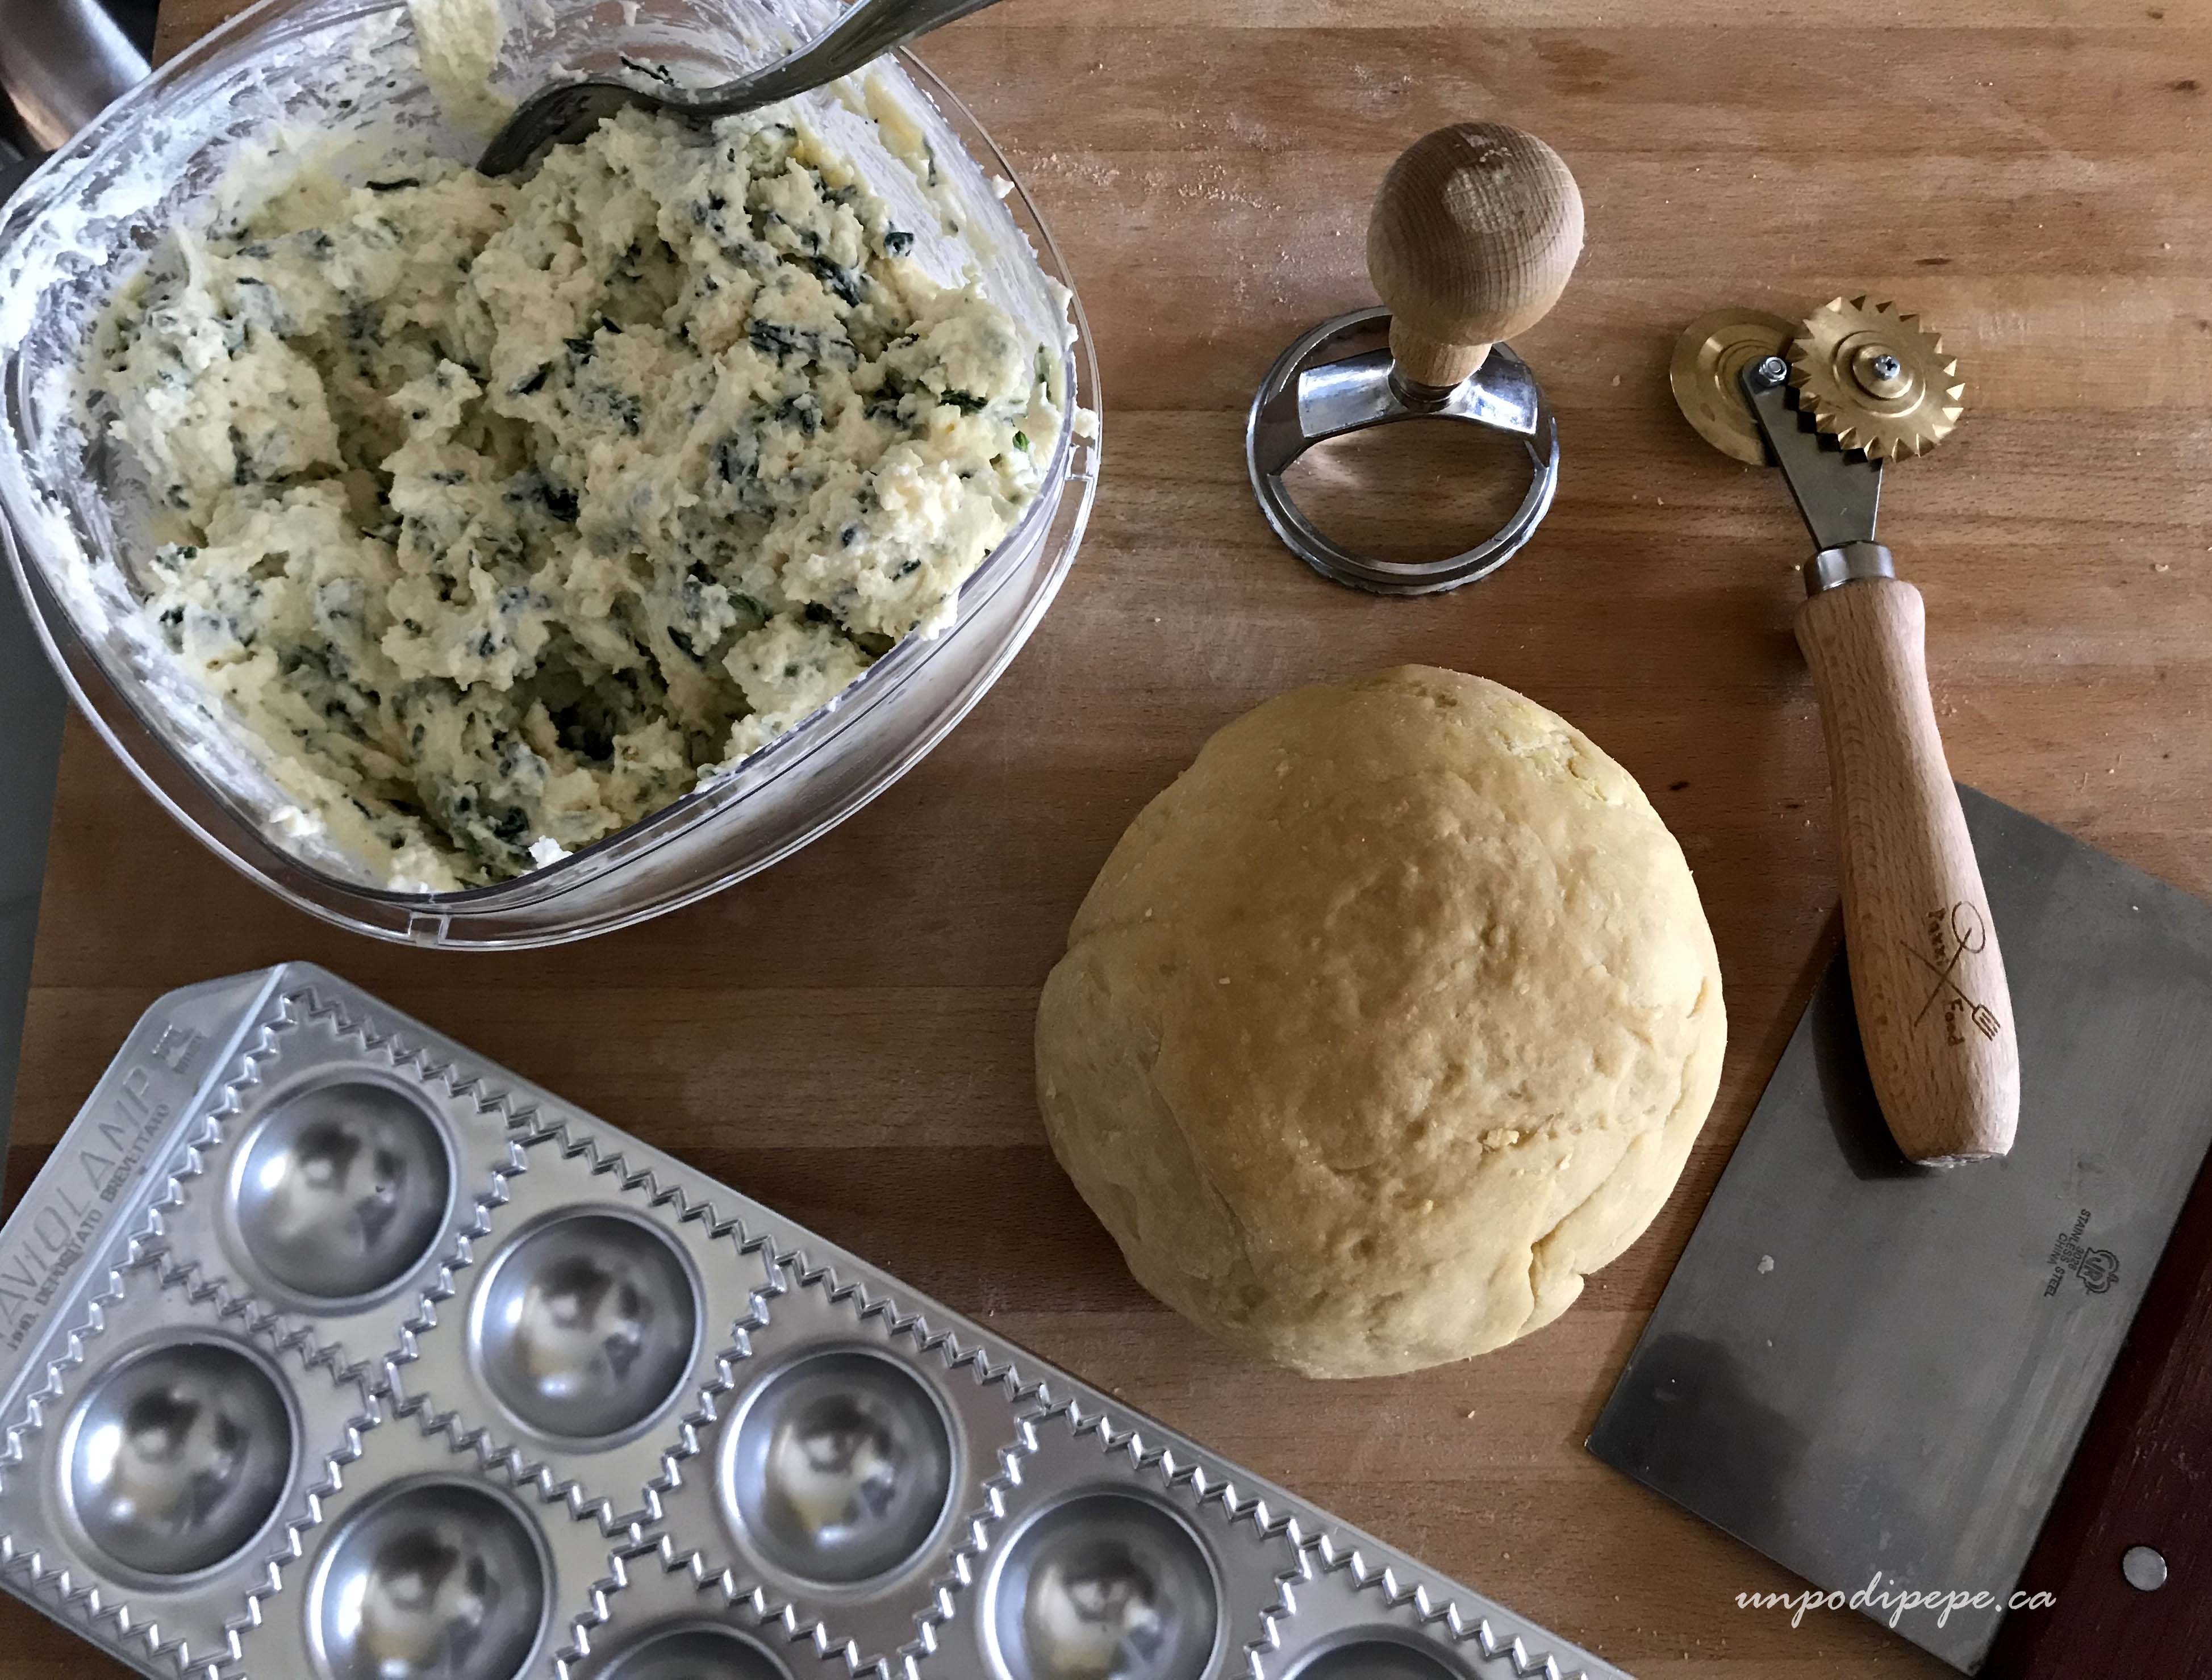
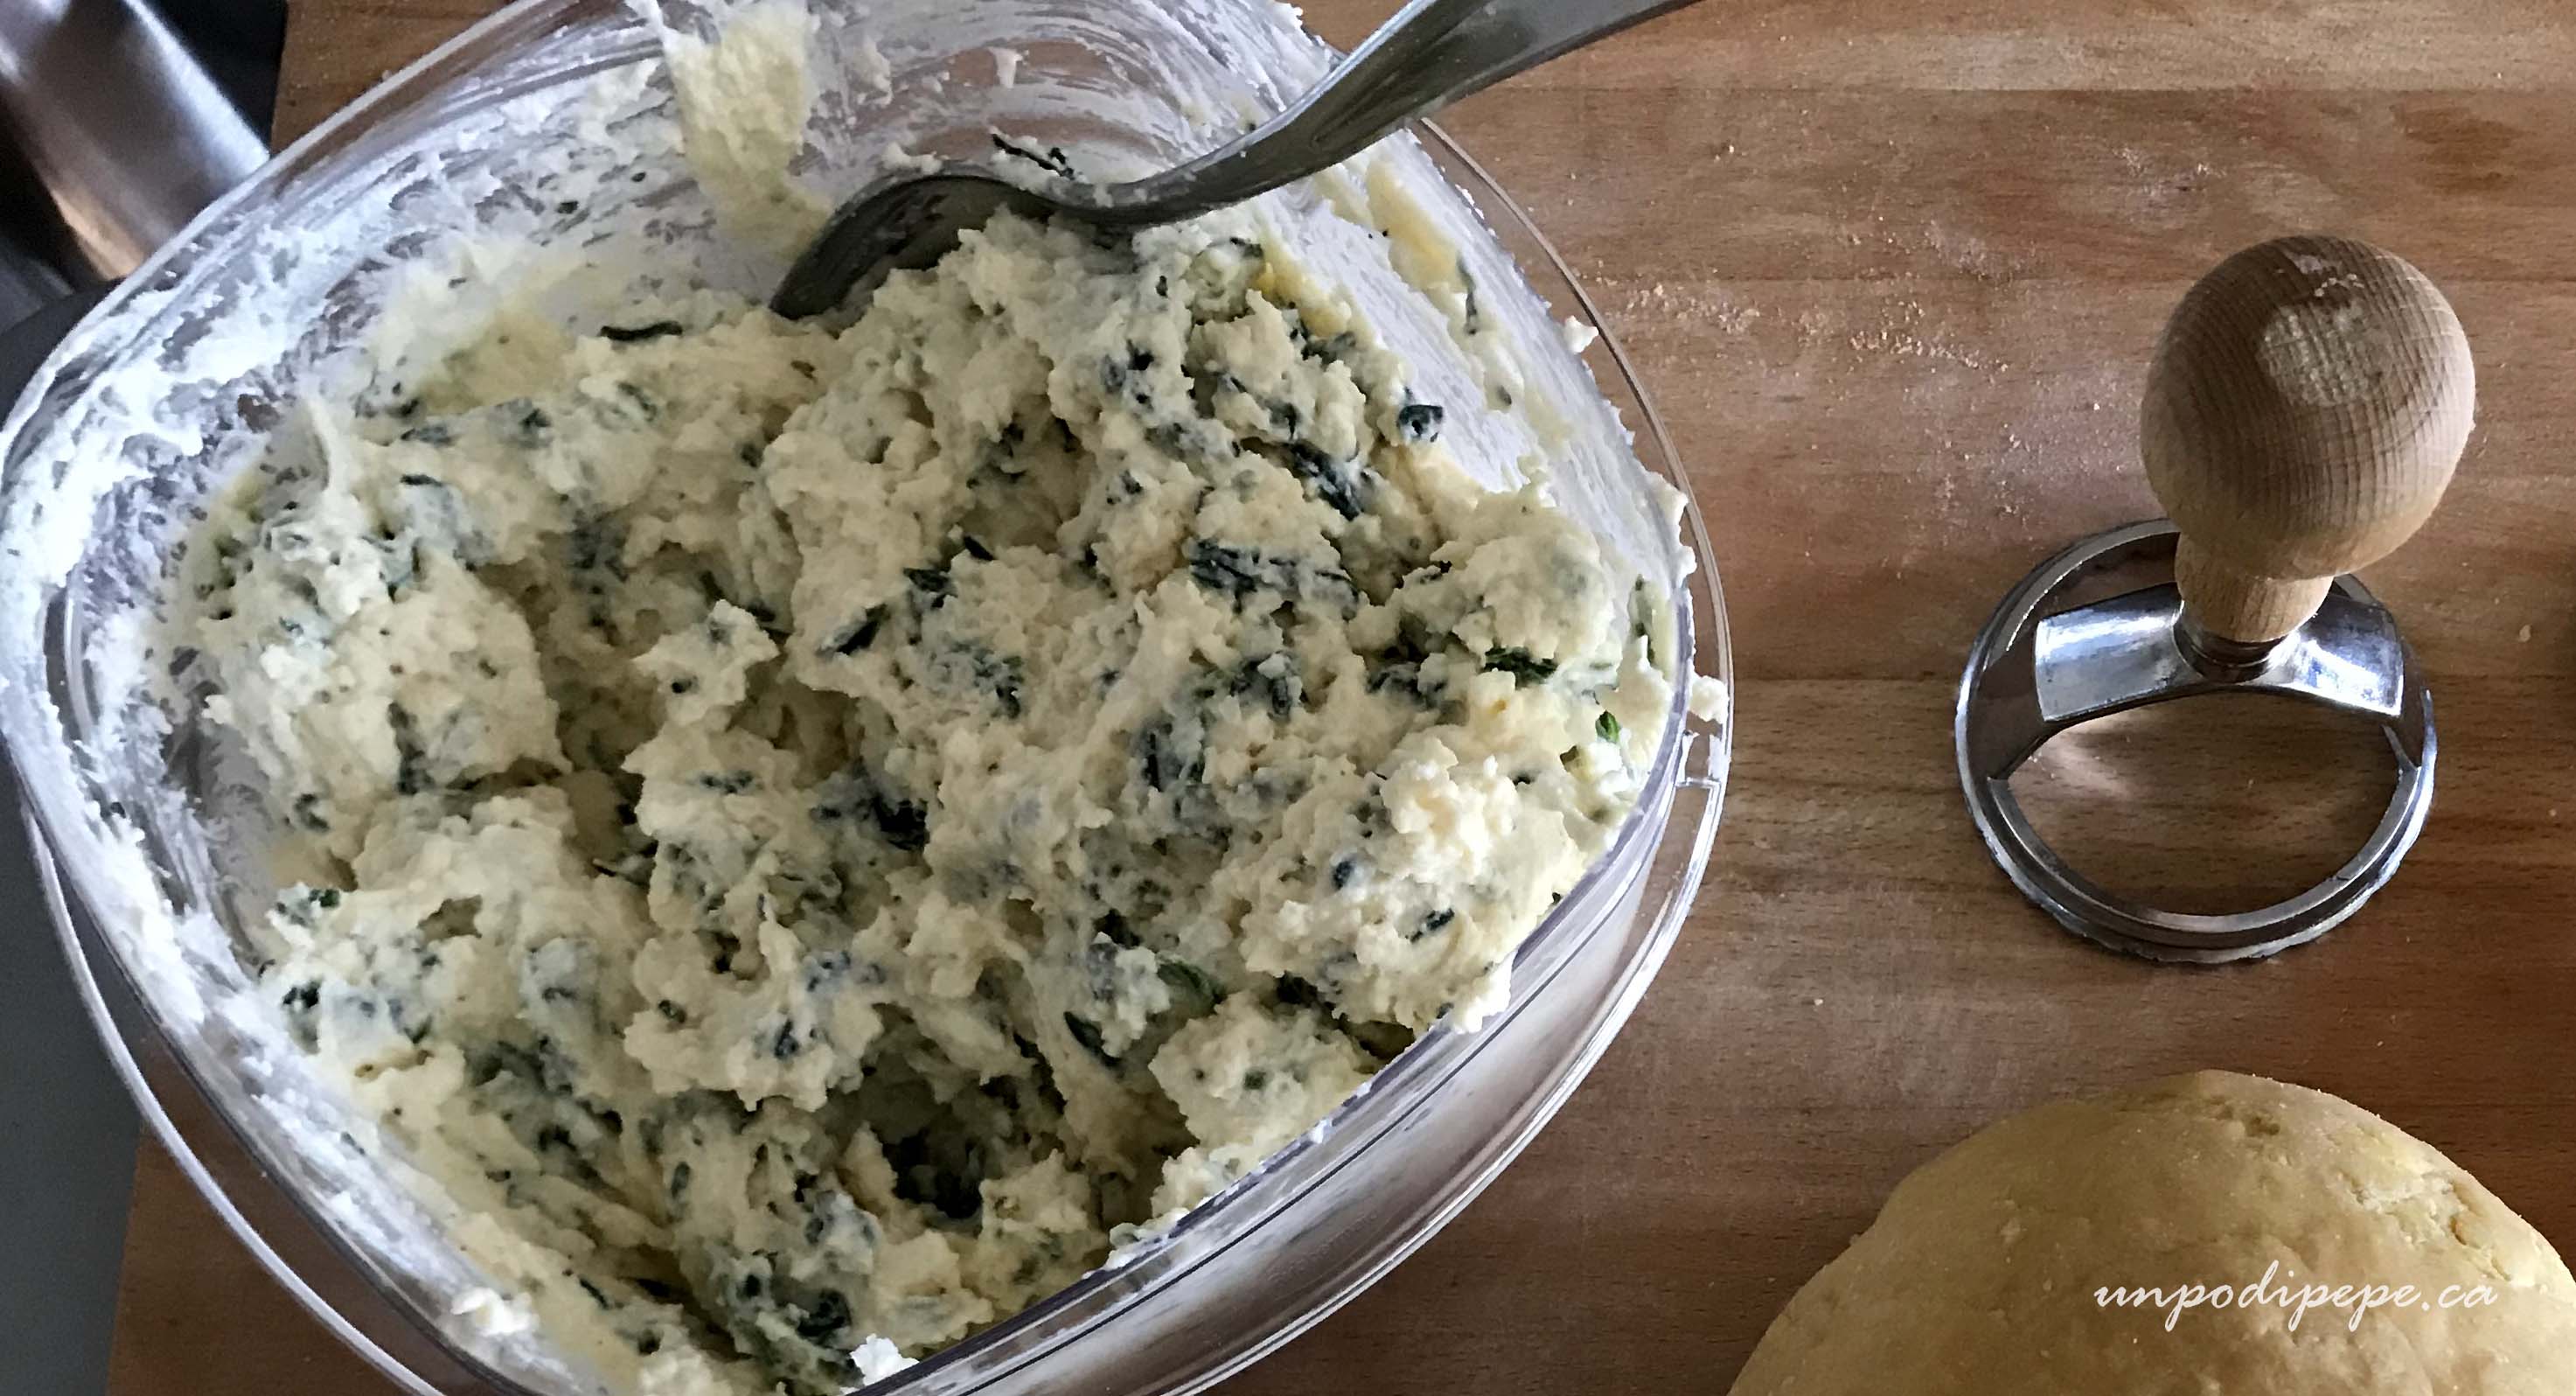
Doubling the dose is not a great idea since you need to work fast. If you make 2-4 doses in a row like I do, you can prepare everything in advance.  I measure all the spices for each dose in a little jar so they are ready to add in, toast the nuts in advance, and have a separate bowl for each dose so I can work quickly. I also have the wafer paper cut in advance and the tart pans ready on a baking sheet.

Let me know how your panforte comes out! Buon appetito e Buone Feste, Cristina

Share this:

  • Click to share on Facebook (Opens in new window) Facebook
  • Click to share on Pinterest (Opens in new window) Pinterest
  • Click to share on X (Opens in new window) X
  • Click to email a link to a friend (Opens in new window) Email
  • Click to share on WhatsApp (Opens in new window) WhatsApp
Like Loading...

World Pasta Day

25 Sunday Oct 2020

Posted by Un po' di pepe in Mangiamo!, Recipes

≈ 10 Comments

Tags

Corzetti, Gnocchi di zucca, Pasta, Pasta all'Amatriciana, Pasta fatta a mano, Ravioli, Ricotta tortelloni, World Pasta Day


October 25th is World Pasta Day.  Am I the only one who thought that was every day?  I am not sure who comes up with these dates, but since it seems sort of official, I am posting links to 5 pasta recipe posts from the archives.

Gnocchi di zucca-I like to recycle my Hallowe’en pumpkin by turning it into Gnocchi di zucca.  If Hallowe’en is not happening this year, I will buy one anyways.  Squash will work too.  Zucca actually means both pumpkin and squash, although sometimes squash is called zucca gialla. gnocchi di zucca

These gnocchi are topped with a simple sauce of olive oil, sage and Parmigiano Reggiano.

Spaghetti all’Amatriciana–I posted this recipe for Spaghetti all’Amatriciana following the terremoto, the earthquake in Amatrice a few years ago.

Swap the eggs in Pasta Carbonara for tomato sauce, and you have Pasta Amatriciana! The other 4 ingredients stay the same.

Ravioli di ricotta e spinaci-Stuffed pasta is so fun to make, and turns any meal into a special occasion.  I made these lovely ravioli with my nipotina Francesca this summer.  Making them is not as hard as it looks!  They freeze well, and can go into the pot of boiling water straight from the freezer.Ravioli di ricotta e spinaci

Corzetti-Corzetti are a traditional pasta of Liguria.  The shape is based on medieval coins.  I bought a corzetti stamp in Vernazza during my trip to the Cinque Terre last year and have used it several times.  If you do not have a corzetti stamp, use a glass to cut the circles, and find something around the house to imprint a design.  Be creative. Corzetti pasta con pesto GenoveseThis post includes a few different sauces to try, including Pesto Genovese.

Tortelloni di ricotta– The first time I made these was as a recipe test for a cookbook.  It was during a snowstorm and I had to go out in the snow with a flashlight, dressed like an eskimo, to forage for sage in the garden!  The link to the recipe is in the post.  

The post Grano Arso does not include recipes, but is interesting to read if you are interested in pasta and gastronomic history.

Let me know which one is your favourite. I hope you all enjoy a delicious plate of pasta today. Buon appetito, Cristina

Pasta tools

Share this:

  • Click to share on Facebook (Opens in new window) Facebook
  • Click to share on Pinterest (Opens in new window) Pinterest
  • Click to share on X (Opens in new window) X
  • Click to email a link to a friend (Opens in new window) Email
  • Click to share on WhatsApp (Opens in new window) WhatsApp
Like Loading...

Limoncello

07 Friday Aug 2020

Posted by Un po' di pepe in Italia, Recipes

≈ 25 Comments

Tags

Campania, Homemade liqueur, Limoncello, Southern Italy

LimoncelloQuando la vita ti da limoni…fai il limoncello! When life gives you lemons…make limoncello! This is a good motto for life.  I usually make homemade limoncello or other infused liqueurs with vodka, as 90% grain alcohol is not available in Canada.  With the hand sanitizer shortage 3 years ago at the beginning of the pandemic, my fratello was able to order 151 proof (71%) Everclear grain alcohol to make his own. When hand sanitizer was available again, he had an extra bottle, so I used it to make limoncello.  It is not the 191 proof (90%) alcohol that liqueurs are usually made with-but close enough, and definitely better than using vodka.

Limoncello (lee·mohn·CHEL·loh) is an Italian liqueur, made mostly in Southern Italy, especially in the Amalfi/Sorrento area where the limoni are large and fragrant. It is usually served chilled as an after dinner digestivo. I use it in many of my desserts too!Limoni organic lemons

To make limoncello, you need 1L (4 cups) of grain alcohol and 8-10 organic lemons.  Limoncello is made only with the scorza, or lemon peel, so the lemons must be untreated.  I used the juice to make limonata.Making limoncello

Peel lemons with a vegetable or potato peeler, taking only the peel, not the pith (the white stuff). If a bit of pith snuck in there, scrape it off with a knifeMaking limoncello

Place the lemon peels in a large airtight glass jar.  I used a 2L jar that used to hold artichokes, rinsing it out with vinegar and soap to remove any smell.Limoncello steeping

Cover lemon peels with alcohol and leave the jar to steep in a dark cool place for 2 weeks or more.  A cantina is ideal if you have one.  Give the jar a good shake every few days.  When the peels are very pale, almost white, it is done.  The liquid will be a gorgeous golden colour.Discarded lemon peels from limoncello production

Mix 750 ml-1L (3-4 cups) water with 500 ml (2 cups) sugar in a saucepan.  Simmer over medium heat until the sugar is dissolved, then let the syrup cool.Bottling limoncello

Strain lemon peels from the alcohol and add cooled syrup.  It will be a cloudy yellow once the lemon essential oils and water mix together.  If using vodka instead of grain alcohol, use less syrup.  Shake the jar and leave it in the cantina or a cold, dark place for 1-2 weeks.  Then ladle into small bottles with pop-tops or secure tops and leave for 1 more week to intensify the lemon flavour.Making limoncello

Il limoncello è pronto. Salute!

Posts with recipes using limoncello:

Limoncello Cheesecake

Limoncello Ricotta Cookies

Olive oil Limoncello Cake

Ciao, Cristina

(originally posted in August 2020, and somehow was accidentally deleted!)

Share this:

  • Click to share on Facebook (Opens in new window) Facebook
  • Click to share on Pinterest (Opens in new window) Pinterest
  • Click to share on X (Opens in new window) X
  • Click to email a link to a friend (Opens in new window) Email
  • Click to share on WhatsApp (Opens in new window) WhatsApp
Like Loading...

Ravioli di Ricotta e Spinaci

30 Tuesday Jun 2020

Posted by Un po' di pepe in Mangiamo!, Recipes

≈ 26 Comments

Tags

Homemade ricotta, Italian cooking, Pasta, Pasta fatta a mano, Ravioli, Stuffed pasta, Vegetarian pasta

Ravioli di ricotta e spinaciStuffed pasta is more of a special occasion dish than an ‘everyday’ pasta, and really fun to make by hand. I especially like large ravioli, as they look like little gift packages-and everyone loves presents!

Making ravioli is more efficient and fun as a team effort.  I recently spent a morning with my nipotina Francesca making ravioli with a creamy ricotta and spinach filling. Since I needed to measure out the recipe for her, I decided to share it in a post.Ravioli di ricotta e spinaci

Pasta naming can be confusing, and there are also regional differences.  Ravioli are usually square, but can also be round or mezzalune –half moons.  They are usually made with a filling between 2 thin pasta sheets, sealed and cut.  Large ravioli are sometimes called agnolotti- a sub category of ravioli where pasta sheets are folded over a filling, sealed and cut.  One example is agnolotti del plin.  As you see in the photos, some of our ravioli were made folded over, and some not, so we just call them all ravioli.ravioli di ricotta e spinaci

To make the pasta:

Fresh egg pasta is generally made with 1 egg to every 100g flour.  I use finer OO (doppio zero) flour as it makes a more elastic dough which is more likely to stay al dente. All purpose flour can be used as well, or a combination of the 2.

Depending on the size of the eggs, an extra yolk may need to be added, or a bit less flour.  The dough should not be too dry, or the ravioli will not seal properly and will open while cooking.

I usually use 5 eggs and 500g 00 flour, which will use up all of the filling. This makes about 75-80 ravioli 5cm (2 inch) square.

Tip the flour onto a wooden board.  Make a wide hole in the center of the flour and add the eggs.  Move a few tablespoons of the flour off to the side in case it is not needed.  This prevents needing to add water because the pasta is too dry!Pasta all uovo

Beat the eggs with a fork and slowly start to mix in some flour.  Keep adding flour from the inner edge of the wall.  When the egg mixture is no longer runny, start kneading by hand.

Knead for 10 min using the whole hand.  Keep folding and turning until the dough is shiny and elastic.  Shape into a ball.  Cover with an overturned bowl and let the dough sit for 30-60 min.  This lets the gluten relax, and the dough will be more elastic and workable.

A stand mixer or food processor can be used to make the dough, but it does not come out as nice, plus I find it more work to wash the appliances than to mix it myself.

To make the filling:

The filling can be made the night before, or while the pasta is ‘relaxing’. I do not really measure the ingredients.  Use less ricotta and more spinach if you like.  I often make them without any spinach.  These are the approximate amounts:

500-600 g (~2 cups) ricotta, drained

80-100g Parmigiano Reggiano, grated (¾ -1 cup)

2 egg yolks

500g fresh spinach, cooked, drained and chopped finely, or 200g frozen spinach, thawed and drained

A pinch of freshly grated nutmeg

Salt and pepper qb*

The ricotta I use comes in its own little draining basket.  The basket can sit in a colander over a bowl to drain for a few hours.  To make your own ricotta, check out the post Ricotta fatta in casa.  Make sure to squeeze out all of the water from the spinach as well. Extra moisture will produce soggy ravioli.  Yuck!  Mix all ingredients with a fork.  Cover and store in the fridge until the ravioli are ready to fill.

To make the ravioli:

Cut off one piece of dough at a time (~1/8th of the total) and leave the rest under the bowl so it does not dry out.  Lightly flatten the dough with fingers and run it through the pasta machine twice on the widest setting.  Gradually run the dough through at thinner settings, until the second thinnest setting.

Since ravioli is double layered, the pasta should be as thin as possible.  The green spinach should be visible through the pasta!Ravioli di ricotta e spinaci

The dough can also be rolled out by hand, but it takes real talent and years of practice to roll out a sfoglia thin enough for ravioli!

Work with only 1 piece of dough at a time-or the pasta will dry out and not stick together.  Try not to add any extra flour to the dough or the board when making stuffed pasta as this will also prevent sticking.Ravioli mold RaviolampRaviolamp ravioli mold

I have a ravioli mold called a Raviolamp, and a round ravioli cutter, but I also like to make them ‘freeform’.  We made a combination of all 3 so that Francesca could try them all!  They do not have to all look the same-but try to make them all the same size so they take the same time to cook.Ravioli di ricotta e spinaci

Using 2 teaspoons, drop 1 heaping teaspoon of filling on the pasta sheet 2 fingers apart.  Either use 2 sheets, 1 for the top and 1 for the bottom, or 1 long sheet and fold it over.  Press in between the filling with the heel of hand, making sure to remove any air. The filling can be piped out of a pastry bag if you want to get fancy.Ravioli di ricotta e spinaci

Cut the squares with a fluted pastry wheel or ravioli cutter.  The Raviolamp makes 12 ravioli stuck together, then they can be cut apart with the pastry wheel.Ravioli mold RaviolampI use the leftover dough to make a few ‘freeform’ ravioli rather than putting it through the pasta machine again.  Use the leftover bits as soon as possible so they do not dry out. The finished ravioli can go on a floured tea towel on a cookie sheet until they are ready to cook or be frozen. Ravioli di ricotta e spinaci

Cook the ravioli in a large pot of boiling salted water.  If cooking frozen ravioli, do not defrost.  Drop them into the boiling water directly from the freezer.  Cook for ~4 minutes, or 1 minute after they float to the top.  Remove with a slotted spoon.Ravioli di ricotta e spinaci

These ravioli should be served with simple sauces.  While they are cooking heat up olive oil with some garlic and fresh sage.  They are also delicious with a simple tomato sauce. For either sauce, top with freshly grated Parmigiano Reggiano and bite into them!Ravioli di ricotta e spinaci

Buon appetito, Cristina & Francesca

*qb=quanto basto meaning however much is needed.  This is what you commonly see in recipes written in Italian

Share this:

  • Click to share on Facebook (Opens in new window) Facebook
  • Click to share on Pinterest (Opens in new window) Pinterest
  • Click to share on X (Opens in new window) X
  • Click to email a link to a friend (Opens in new window) Email
  • Click to share on WhatsApp (Opens in new window) WhatsApp
Like Loading...

Corzetti

17 Friday Apr 2020

Posted by Un po' di pepe in Mangiamo!, Photography, Recipes

≈ 32 Comments

Tags

Cinque Terre, Corzetti, Corzetti with mushroom and walnut sauce, Italian cooking, Liguria, Pasta, Pasta fatta a mano, Pesto Genovese, Printmaking

Corzetti (cor∙ZET∙ti) are a traditional pasta of Liguria, also called croxetti (cro∙shet∙ti) or crosetti in Ligurian.  Corzetti are an embossed pasta shaped to look like gold coins.  The name comes from ‘crux’, latin for cross. They  have been around for a very long time. We know this because the Republic of Genoa had a medieval coin with a Genovese cross and there is a 1362 literary reference to pasta with crossetti served at a banquet.Stampo per corzetti

Corzetti are made with un stampo per corzetti- a corzetti stamp.  This is a 2 part device made of unfinished wood-usually pear wood.   The textured finish of the wood is functional-it transfers to the pasta and helps hold sauce, as does the embossed design. The bottom of the lower half is used to cut the circles. The top of the lower piece and the upper piece with the handle for pressing each have a carved design.Corzetti pasta con grano

Corzetti are like edible woodcut prints!  The perfect pasta for a printmaker.  This must be why I like making them so much!
If you read the posts Le Cinque Terre and Exploring le Cinque Terre, you may remember my determined quest to find a corzetti stamp.  In Corniglia, I found dried corzetti for sale, but no stamp.  I did not notice any restaurants serving them either, but I also did not look very hard.  I finally found a stamp by accident in a tiny shop in Vernazza, the town where we were staying. They were in a basket at the back, where no one could see them!

The design on my stamp is a stem of wheat, with a swirl on the other side.  It cost 11 Euro and was carved by a local fisherman.  I saw a similar one online for $72 US.  You can also custom order stamps but they can be very expensive.  It is much more fun to buy something like this where it is produced.

Noble Ligurian families had their family coat of arms engraved on the stamps.  Designs also include crosses, wheat, gigli (fleur de Lis) or the emblem of il pastaio, the pastamaker.

Circles are cut on a freshly rolled sfoglia or pasta sheet-not too thick, but thick enough to hold the embossing.  Each corzetto is pressed between the 2 parts of the stamp, embossing a design on each side.  If the pasta is rolled out too thin, the designs will transfer to the other side.Stampo per corzetti Corzetti stamp

Corzetti dough is traditionally made with eggs and white wine.  It is usually made with flour and semola rimacinata di grano duro (called semolina in North America) or chestnut flour.  Traditionally, corzetti are served with pesto or olive oil, herbs and pine nuts.  They can also be served with an herb and scallop or mushroom walnut sauce.  I have made corzetti several times now, and here is the dough combination I found works the best:

To make Corzetti:

200g (1.5 cups) 00 or All-Purpose flour

200g (1.5 cups) semola rimacinata (Semolina)

3 medium sized eggs plus 2 yolks-add an extra egg if they are small

60ml dry white wine (1/4 cup)

5ml (1 tsp) Extra virgin olive oil

Pinch of salt

Make a well with the flours on a wooden board.  Place the eggs, wine and EVOO in the center and beat with a fork, then slowly start to mix in the flour.  This dough needs to be soft and elastic to hold the embossing and you may not need all of the flour. Keep some to the side in case it is not needed. Once the mixture is less liquid, start to mix by hand.  Knead for 10 minutes.  Roll into a ball, cover and let rest for 30 min.

Use half the dough at a time, and keep the other half from drying out by covering with an upturned bowl.  Roll the dough out by hand 3mm thick.  You can use a pasta machine, but hand rolling will result in a better embossing.  Lightly flour the corzetti stamp.  Cut circles as close together as possible.  Pasta rolled out multiple times will not be consistent thickness and will dry out, and not take the embossing as well. Stand up while pressing down firmly on the top of the stamp with the palm of the hand to get the best quality embossing. This makes 60-65 corzetti.
Corzetti pasta con pesto Genovese

I like to serve corzetti with a traditional Pesto Genovese. This mushroom walnut sauce is also yummy.Corzetti con funghi e noce

Corzetti con Funghi e Noce / Corzetti with Mushrooms and Walnuts

200g porcini mushrooms or mixed mushrooms in season

1 onion, 1 carrot, 1 celery stalk

2 cloves garlic

Prezzemolo (Italian parsley)

200 g (~3/4 cup) walnuts shelled

30g (2 tablespoons) pine nuts

Dry white wine

EVOO, salt

Finely chop everything except the pine nuts.

Make a soffritto-Fry the onion in olive oil, add carrot and celery, half of the garlic and the pine nuts

In another pan, fry the mushrooms (these can be finely chopped or just separate the tops and bottoms) then add the soffritto. Add wine and cook for 30 min.

Before serving, add salt, the rest of the garlic, and prezzemolo

Cook corzetti in boiling salted water for 3-4 min.  Add mushroom sauce and sprinkle with the chopped walnuts and grated Parmigiano Reggiano.

Want to try making corzetti, but don’t have a stamp?  Cut circles out with a 5cm (2 inch) diameter drinking glass.  Use a cookie press for the design, or find something that can be lightly pressed to make a design in the dough-a wax seal, a ring, the crosshatch design on your meat tenderizer…..  get creative!Corzetti pasta con grano

It is hard to believe I was in Liguria 11 months ago.  Since we can not travel there-or anywhere at this time, I hope this helps you viaggiare in pultrona… armchair travel to the coast of Liguria and the Cinque Terre.  Buon viaggio and stay safe, Cristina

Share this:

  • Click to share on Facebook (Opens in new window) Facebook
  • Click to share on Pinterest (Opens in new window) Pinterest
  • Click to share on X (Opens in new window) X
  • Click to email a link to a friend (Opens in new window) Email
  • Click to share on WhatsApp (Opens in new window) WhatsApp
Like Loading...
← Older posts

Enter your email address to follow 'un po' di pepe' and receive notifications of new posts by email.

Join 511 other subscribers
Follow Un po' di pepe on WordPress.com

Popular Posts

  • Hairstyling in Ancient Roma
    Hairstyling in Ancient Roma
  • Espresso Cookies
    Espresso Cookies
  • Il Pumo Pugliese
    Il Pumo Pugliese
  • Panforte di Siena
    Panforte di Siena
  • Internment of Italian Canadians
    Internment of Italian Canadians
  • San Nicola
    San Nicola
  • Panettone Fatto in Casa
    Panettone Fatto in Casa

Recent Posts

  • Castel del Monte
  • ‘The Nuances of Love’
  • Hostaria Antica Roma~Eat like an Ancient Roman
  • Santa Maria in Aracoeli
  • Casino dell’Aurora~Villa Boncompagni Ludovisi
  • Nasoni di Roma
  • Bloghiversario #11
  • Fontana di Trevi
  • Acqua Vergine
  • Giubileo 2025
  • Sanremo 2025
  • In Vino there are Memories
  • A Literary Harvest
  • 2024~Un po’ di pepe Year in Review
  • Buon Natale 2024
  • Il Bicerin
  • Mercato Porta Palazzo
  • Torino
  • Catanzaro, Calabria
  • Il Pumo Pugliese
  • Artemisia Gentileschi
  • Cavalli di San Marco
  • Panzerotti
  • Torcello
  • 10 years of Un po’ di pepe!

Categories

Amici e Famiglia Architecture Art Art history Art projects Bilingual posts Blogging Canada Culture Feste Firenze Inspiration Italia Italian Folklore Italian language Italian life Italocanadesi Libri Mangiamo! Orsara di Puglia Parole piacevoli Photography Puglia Recipes Roma Travel Travel tips Uncategorized Vino

Archives

Un po’ di pepe on Facebook

Un po’ di pepe on Facebook

Start a Blog at WordPress.com.

  • Subscribe Subscribed
    • Un po' di pepe
    • Join 511 other subscribers
    • Already have a WordPress.com account? Log in now.
    • Un po' di pepe
    • Subscribe Subscribed
    • Sign up
    • Log in
    • Report this content
    • View site in Reader
    • Manage subscriptions
    • Collapse this bar
 

Loading Comments...
 

    %d